⚠️ This option is only available for the Professional or Enterprise Plan.
Accessing and modifing default values
|
1. Go to the “Default values” section in dashboard menu on the left. |
 |
| 2. Select the measurement system whose default values you wish to change |  |
| 3. Click on the pink “Edit” icon at the bottom right. | |
| 4. Change the values using the “Yes/No” value fields, the “Up-Down Arrows,” by typing the value in the dedicated field, and by using the “Choose” button for a coating. |
|
| 5. Validate by clicking on the validation arrow at the bottom right, then click on "Continue” to validate definitively. |  |

ℹ️ Values selected for one measurement system are not applied to the other one.
The layout
For the “Layout” step, you can:
- define the “Layout parameters”, including walls and partition walls' tchickness,
- define the “Level dimensions” (the slab, ceiling, finished floor thickness, and height under ceiling),
- set the “Posts and beams dimensions”,
- and finally, the “Exterior wall materials”.

The roofs
The principle remains the same for each category; you can set the default values according to the type of roof.
For sloped roofs, you can:
- Define the “Roof height” (base height),
- the “Roof Angles (°)” or “Slopes (%)”,
- the “Roof thickness” and “Finished roof thickness”,
- the “Overhang length”,
- and whether or not there is a “Soffit at bottom slope”,
- as well as the default “Roof materials”.

For flat roofs you can set up:
- the “Roof height” (Elevation, in purple),
- the “Parapet height” (in green),
- the “Parapet thickness” (in blue),
- the “Thickness” of the roof (in yellow).
- and the default “Roofing” and “Wall caps”.

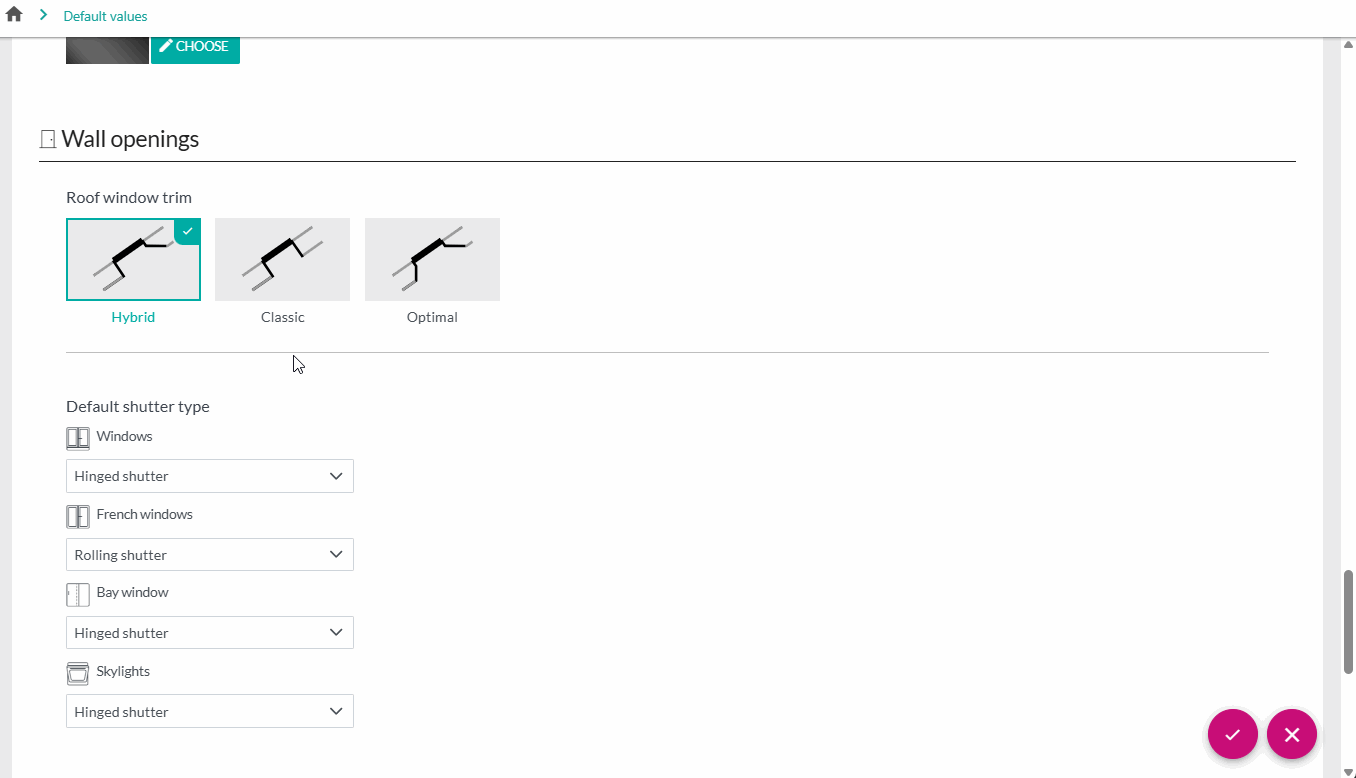
The Wall openings
For the “Wall openings” step, you can choose:
- the cladding for roof windows,
- and the default shutter types.
Plan details
In the “Plan details” step, you can choose whether to display L.A. (living area)/T.I.A (total internal area) areas, as well as set the minimum height for the L.A.
The Folder
In the “Folder” step, you can define the default dimension line end style.
ℹ️ Changes will be automatically applied to your access / all accesses in your company.
⚠️ If you leave the page without validating the changes, they will not be taken into account.