Represent a swimming pool in Exterior Step
With the "Other space" tool in the Exterior step, you can draw a pool in a few clicks.
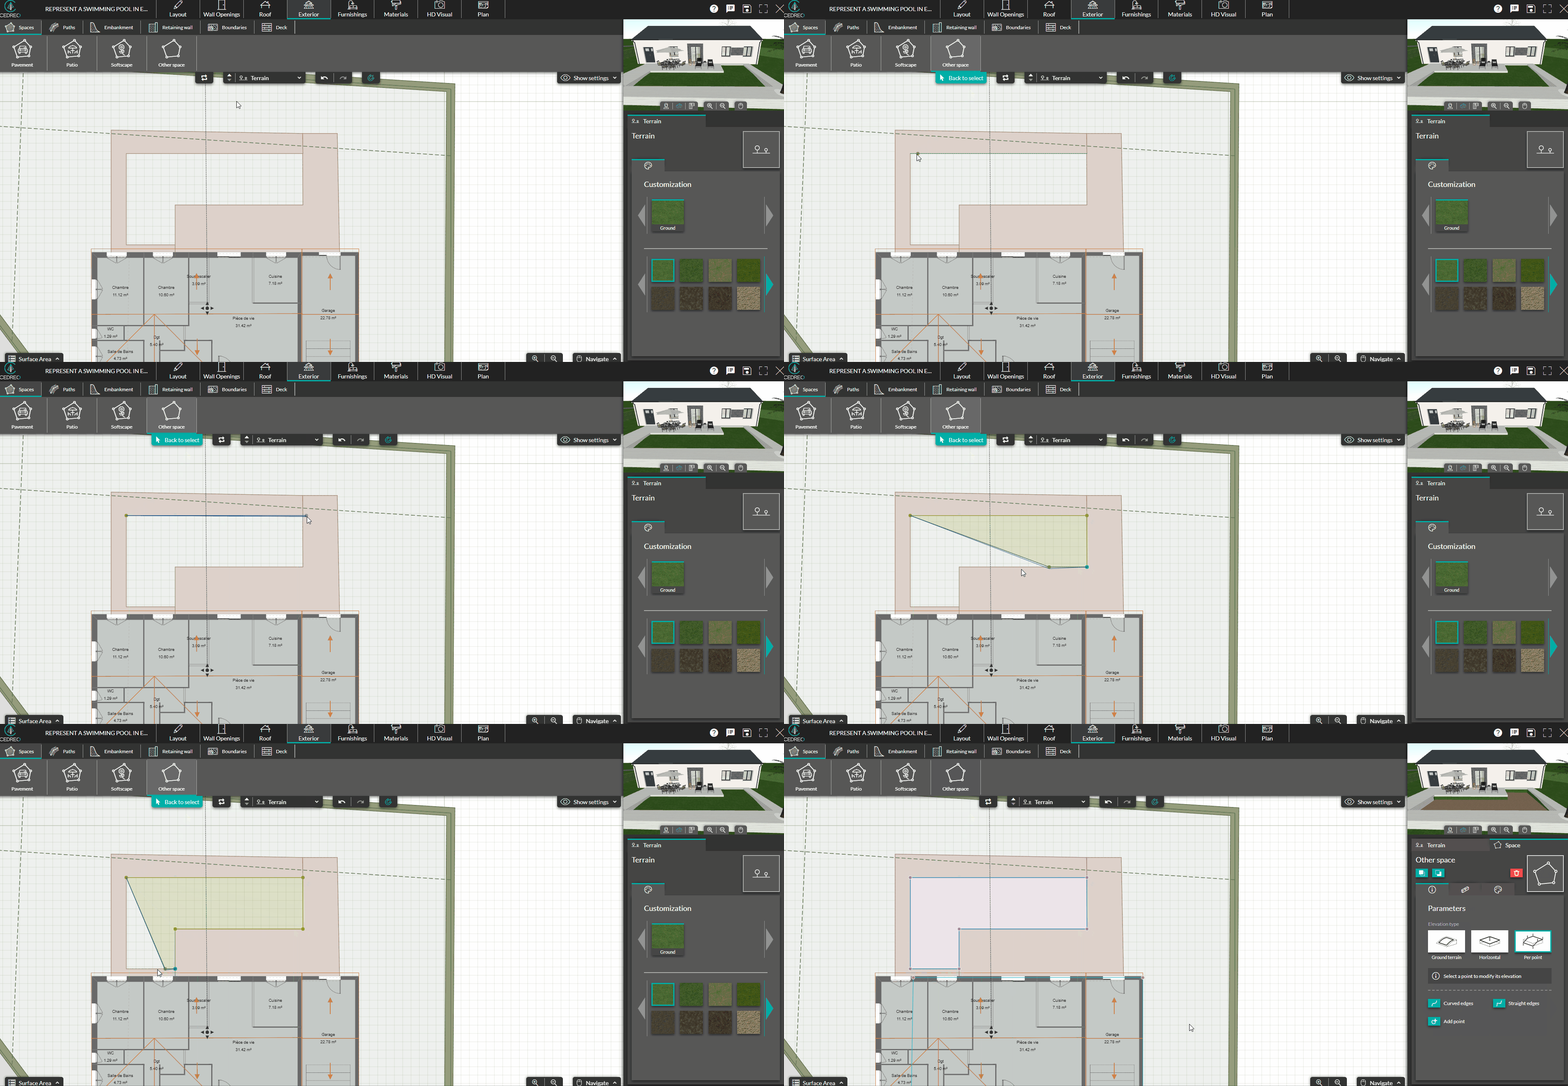
1. Go to the Exterior step, then in the "Spaces" menu, click on the "Other space" tool.

2. Make a first click to start drawing your pool and move your mouse to stretch your line. Make a new click each time you want to turn. Double click to complete the drawing.

❗To draw the pools, we use the 1 click = 1 turn method’s.
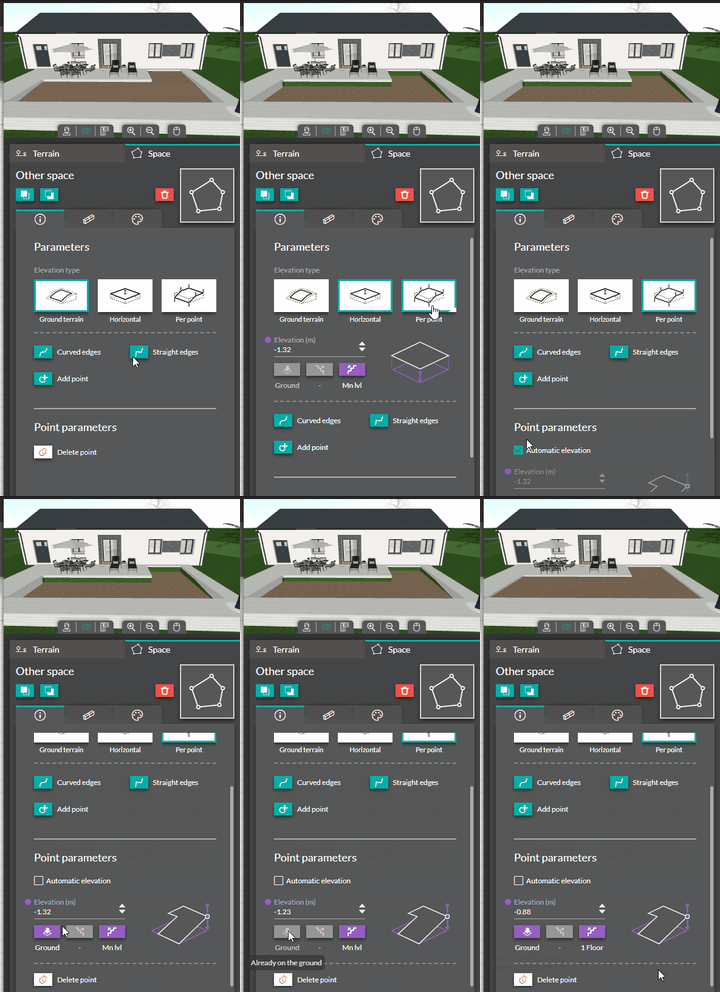
3. Determine the type of elevation you want to apply to your pool by clicking on the dedicated icons.

❗The appearance of your pool will change according to the type of elevation selected. Choose the one that suits you
💡 To have a flat pool, select the "per point" elevation, then define it according to the ground floor by clicking on the ground floor icon or change it at your convenience with the up-down arrows
4. You can add borders to your pool by going to the border tab and clicking on the "Add all over" button.

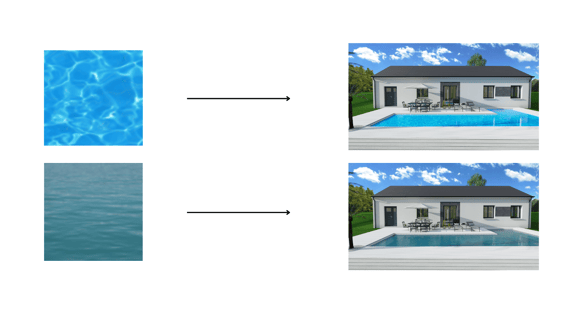
 5. Finally, you can add a material to your area to make it look like a pool. To do this, click on the customization icon represented by a paint palette. Choose your material according to the desired look.
