❗This tutorial is for importing plans on the ground floor and upper floors. For importing a terrain layer, refer to this tutorial.
 1. Go to Layout step
2. In the "Level" menu, click on the Add floor tool
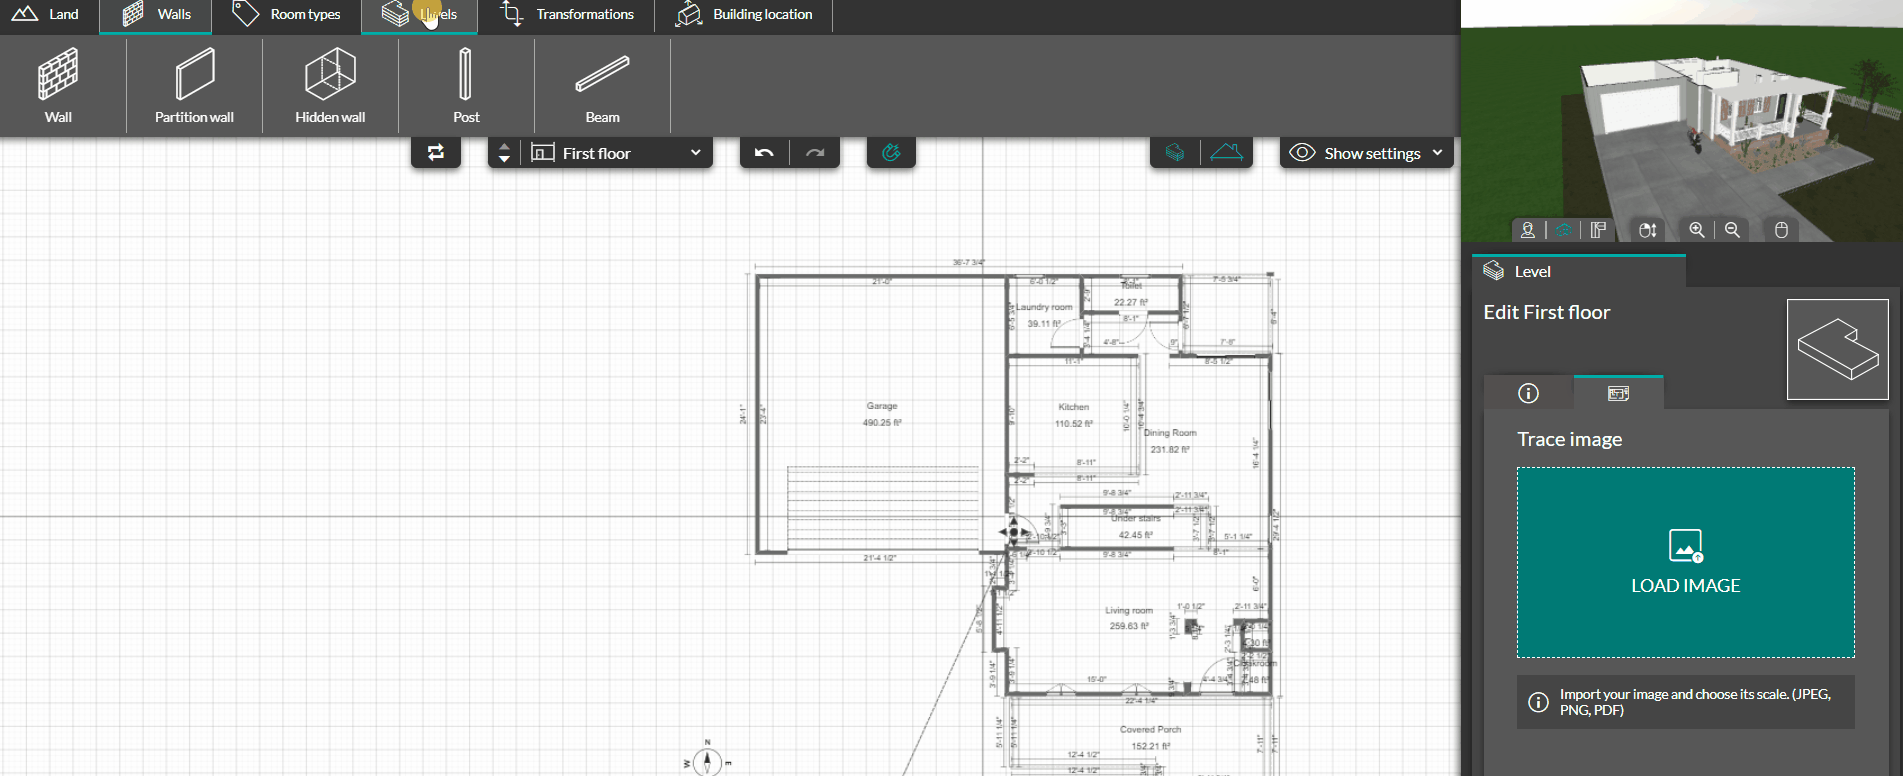
3. In the settings on the right, click on the "Layout" section.
4. Click on the green "Upload an image" button in the right panel.
💡 Click on an empty part of your workspace to display the panel.
5. Select your layout from the files on your computer. The file must be in PNG, JPEG, or PDF format.
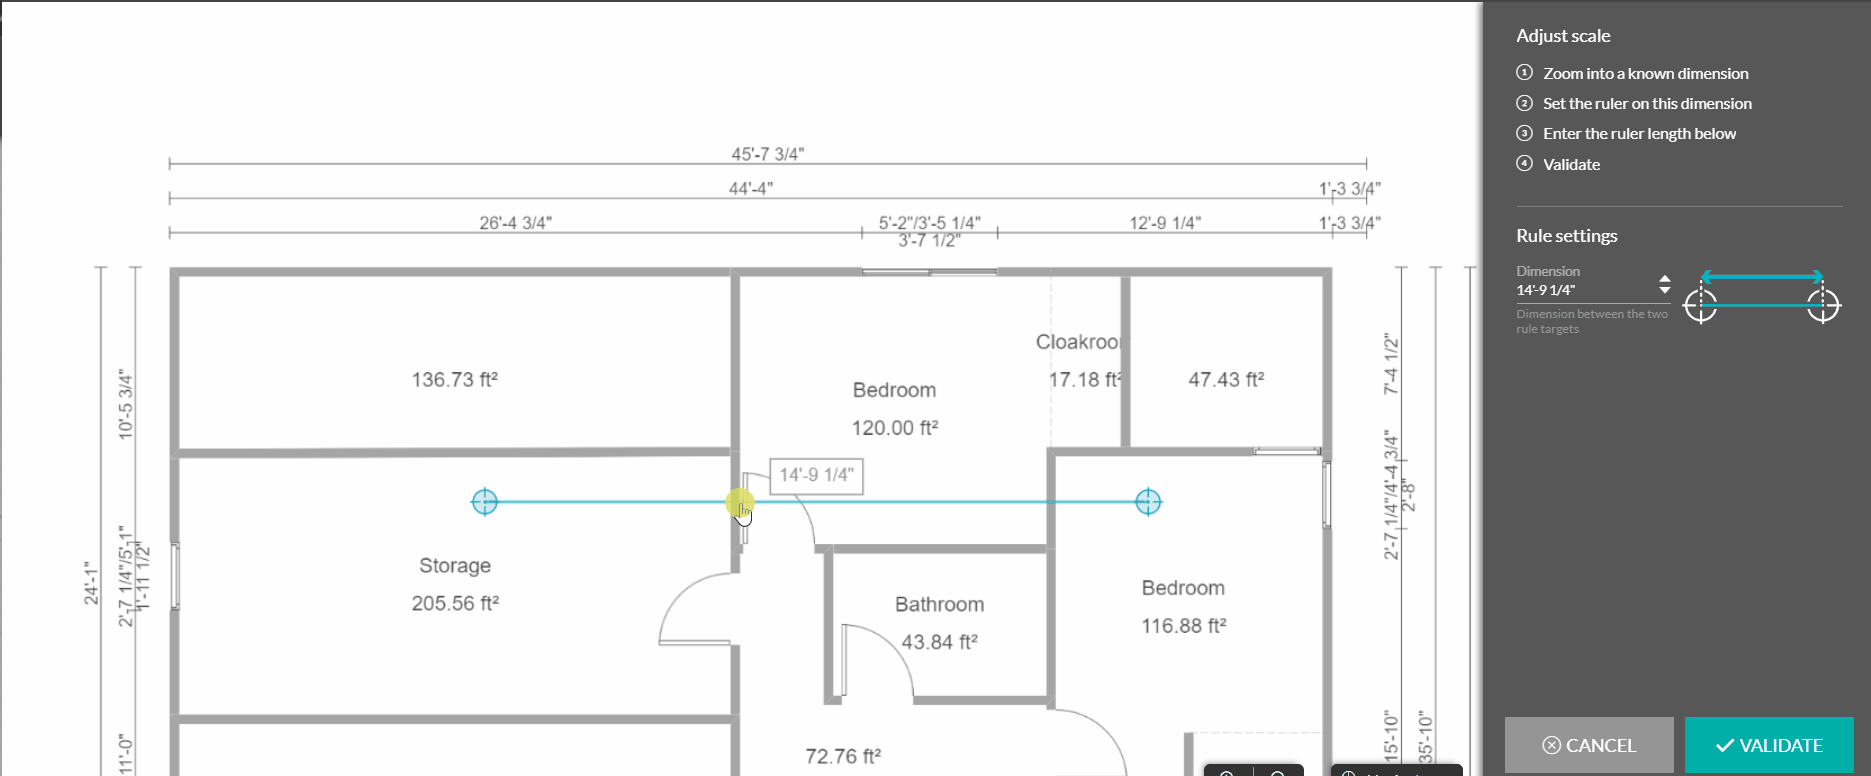
5. Then, move the blue ruler to a known dimension.
❗Left-click is used to move the ruler, right-click is used to move the plan, and the scroll wheel is used for zooming.
💡 Place your ruler on the largest known dimension to limit scaling errors. Position the ends of the ruler as accurately as possible.
6. Enter the value of your ruler in the field on the right (in cm).
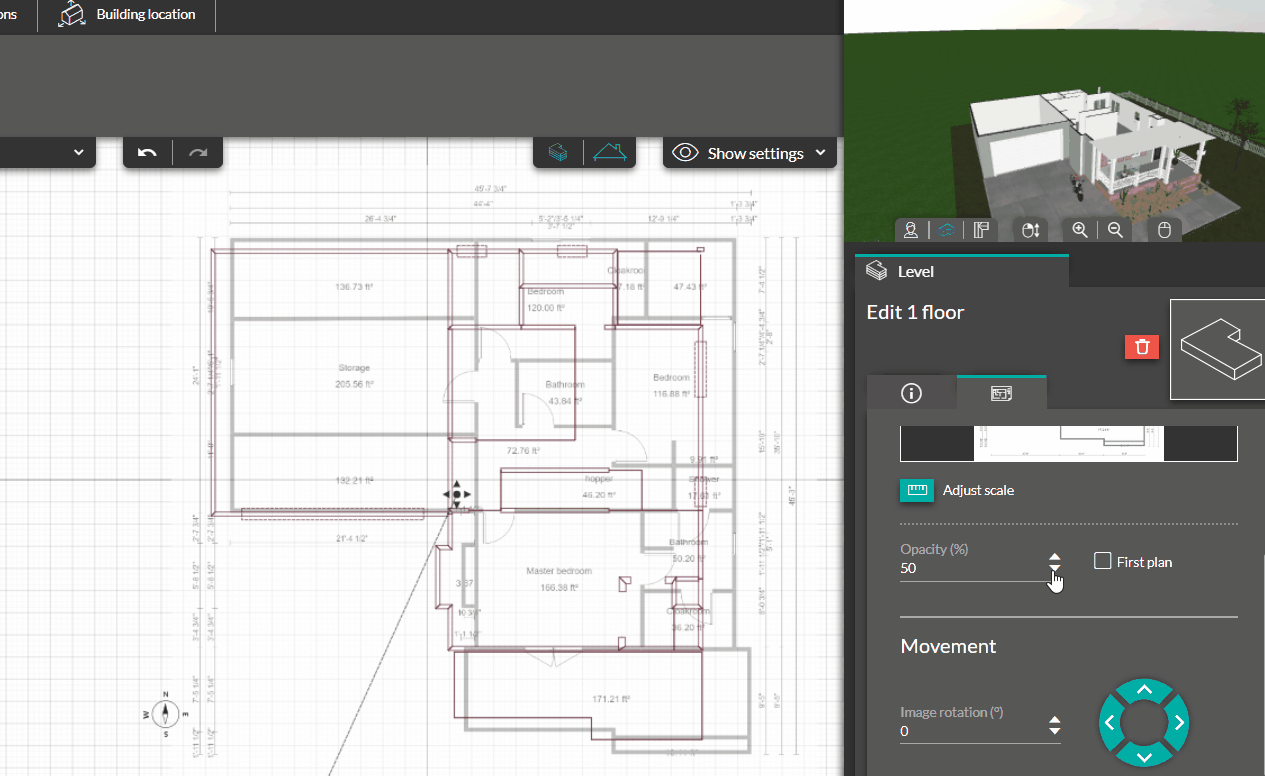
7. The layout will then appear on the grid. You can adjust the layer settings on the right to:
-
- Rotate it: by increasing/reducing the rotation using the arrows or by entering a value in the field.
- Move it: by using the up/down and left/right arrows.
- Reduce or increase its opacity: by changing the value in the field or using the up/down arrows.
- Bring it to the forefront: by checking the dedicated box
9 - Now all you have to do is draw your walls by clicking on the wall tool.
8. Modify the scale of your layer if necessary by clicking on the button with a ruler icon.
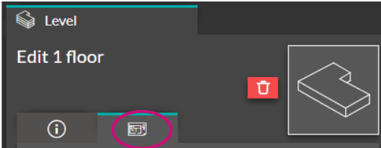
![]() 9. Delete your layer by clicking the red button with a trash can icon.
9. Delete your layer by clicking the red button with a trash can icon.