The technique employed here is identical to the one presented in this article: Drawing property boundaries. Two important changes are to be noted with the terrain module:
- The interface changes slightly,
- The property boundary elements adapt to the terrain elevations and follow the slopes
- An additional tool lets you add fences automatically
Three tools, Hedge, Low wall and Fence are available to allow you to trace property boundaries. These tools can be accessed from the "Exterior" step and then from the "Boundaries" menu.
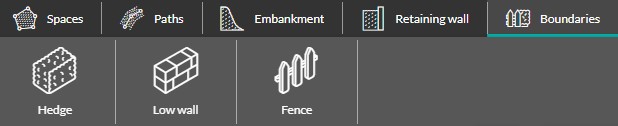
💡 The hedge and low wall options have the same functionalities, only their default values and quick material choices differ.
1. Select one of the three tools (hedge, low wall or fence), and the software will automatically choose the "Terrain" level.
2. Simply draw the boundaries, on the principle "1 click = 1 turn".
3. To finish the drawing, click a second time on the point marking the end of the boundary to be traced
Modify a boundary
You can add and remove points to each boundary drawing. Additionally, you can modify its dimensions and appearance.
- Add a point
1. Select the boundary to which a point needs to be added.
2. From the right-hand settings, click on "Add point".
3. Finally, place it between two existing points of the boundary to be modified
- Delete a point
1. Select the boundary from which a point needs to be removed.
2. Select the point to be deleted.
3. Finally, click on the "Delete point" button from the right-hand settings
- Modify dimensions (for Hedge and Low wall)
1. Select the boundary to be modified.
2. Change its thickness and height values from the right-hand settings
- Modify the appearance
There are two ways to modify the appearance of a property boundary. The first method is to click on the tab represented by a palette in the right-hand settings after selecting the boundary to be modified. This will give you access to preselected options :
It is also possible, from the 'Materials' step, to select a material and directly click on the property boundary to apply the chosen material to it.
Use "Fence" (specific features)
1. Select the fence and go to the right-hand column (configuration options).
2. Choose the desired fence style from the categories "Wire mesh" - "Panel" - "Railing".
3. In "Parameters", customize the fence elevation (which can be a negative value) to suit the terrain.
❗ The height of the (highest) fence appears below the elevation value
4. In the 2nd configuration tab ("Low wall"), you can automatically add a low wall under your entire fence.
5. Customize its height (this cannot be negative).
❗ The total height of the fence (highest), including the low wall, appears below the latter's height value.
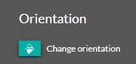
💡As with the "Openings", an option in the 1st tab ("Global parameters") lets you change the fence orientation if required.