Manage earth retention
Cedreo has two tools to manage your slopes: the embankment and the retaining wall. Discover their uses and functions with this tutorial.
Position and customize a retaining wall
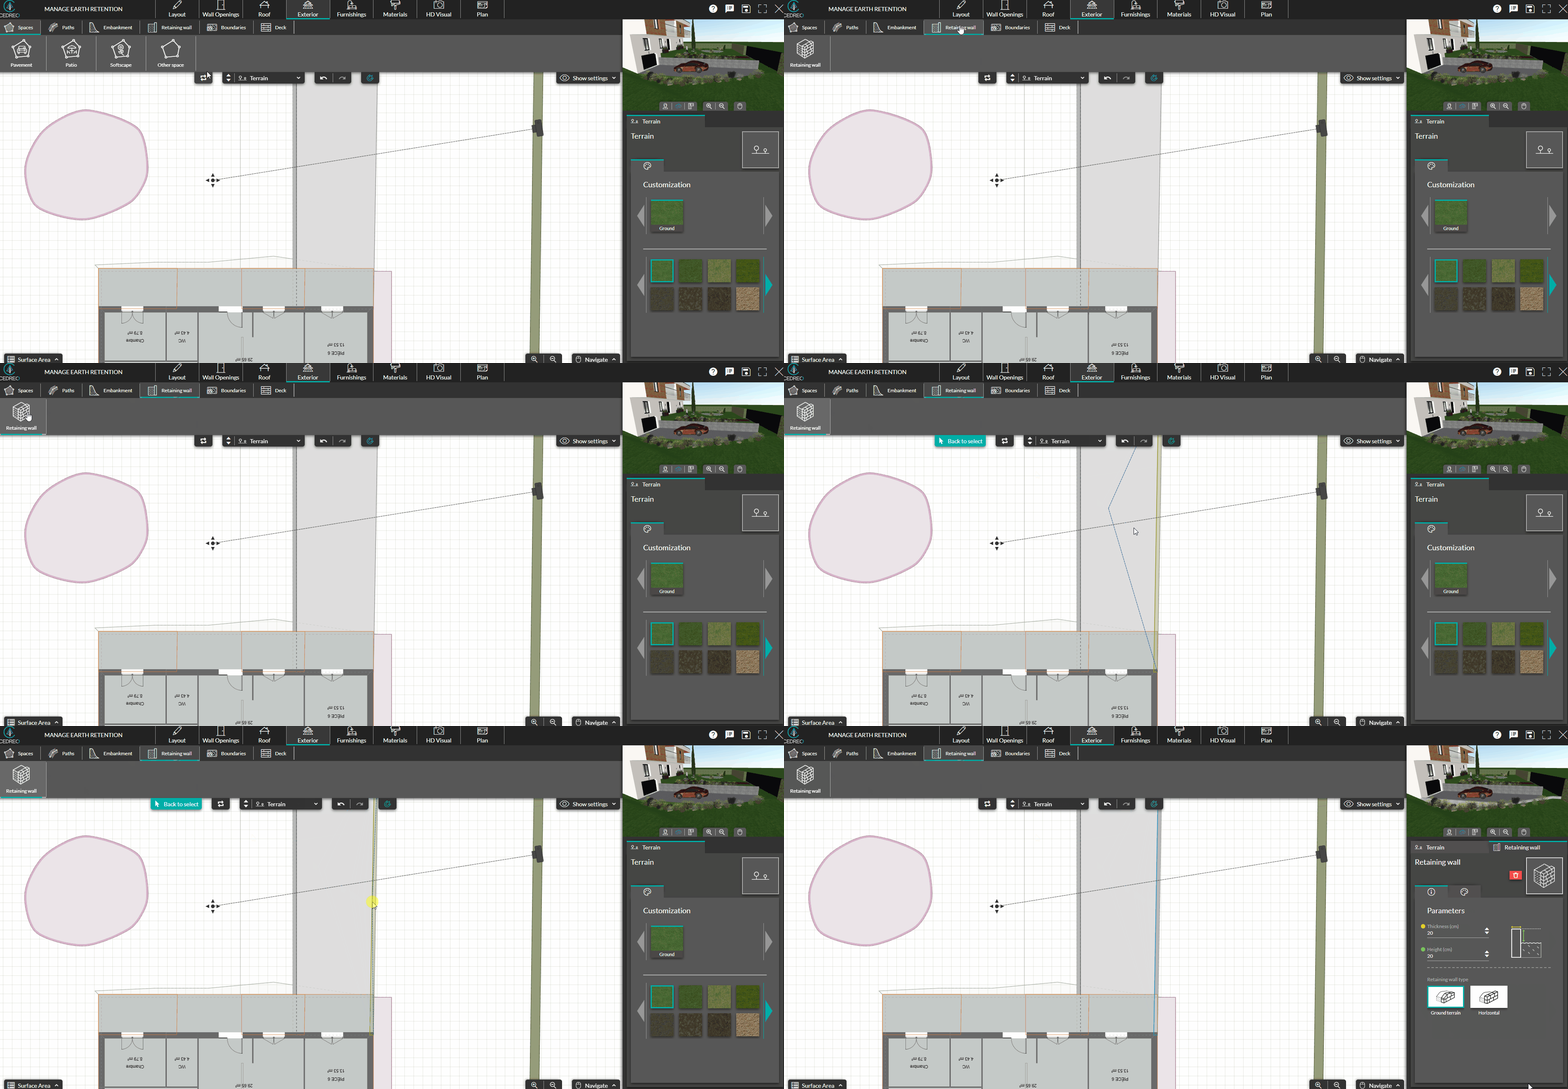
1. In the "Exterior" step, go to the "retaining wall" sub-menu, and click on the dedicated tool.
2. Position your wall on the edge of an area or lane and click to validate.
The wall automatically takes the length of the side on which it is placed.

⚠️ Retaining walls can only be placed on areas or lanes
.gif?width=241&height=420&name=Modify%20a%20retaining%20wall%20(elevation%20%26%20height).gif)
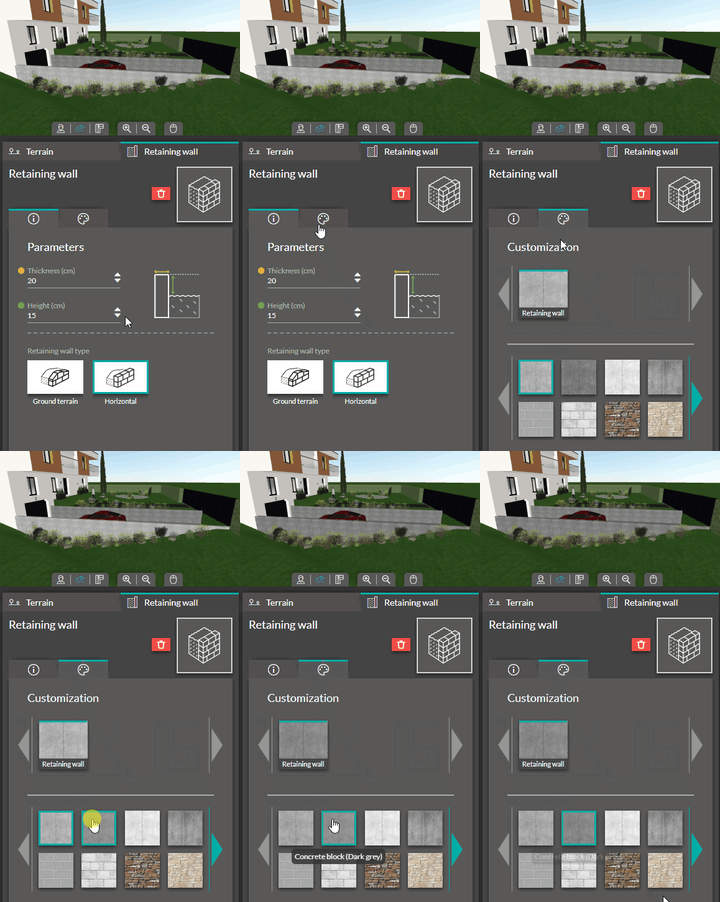
3. To customize it, click on the full edge of the retaining wall (without the dotted lines).
4. In the column on the right, choose the type of wall you want by clicking on the associated icon ("ground terrain" or "horizontal").
5. You can change the height and thickness of the wall in "parameters" using the "up/down" arrows or by entering a value followed by the "feet or inches " symbols then press enter to validate
6. You can also change the material by clicking on the "Customize" icon in the right column and then on the desired material.

💡 You have a wider choice of materials in the "Material" step.
Create and customize an embankment
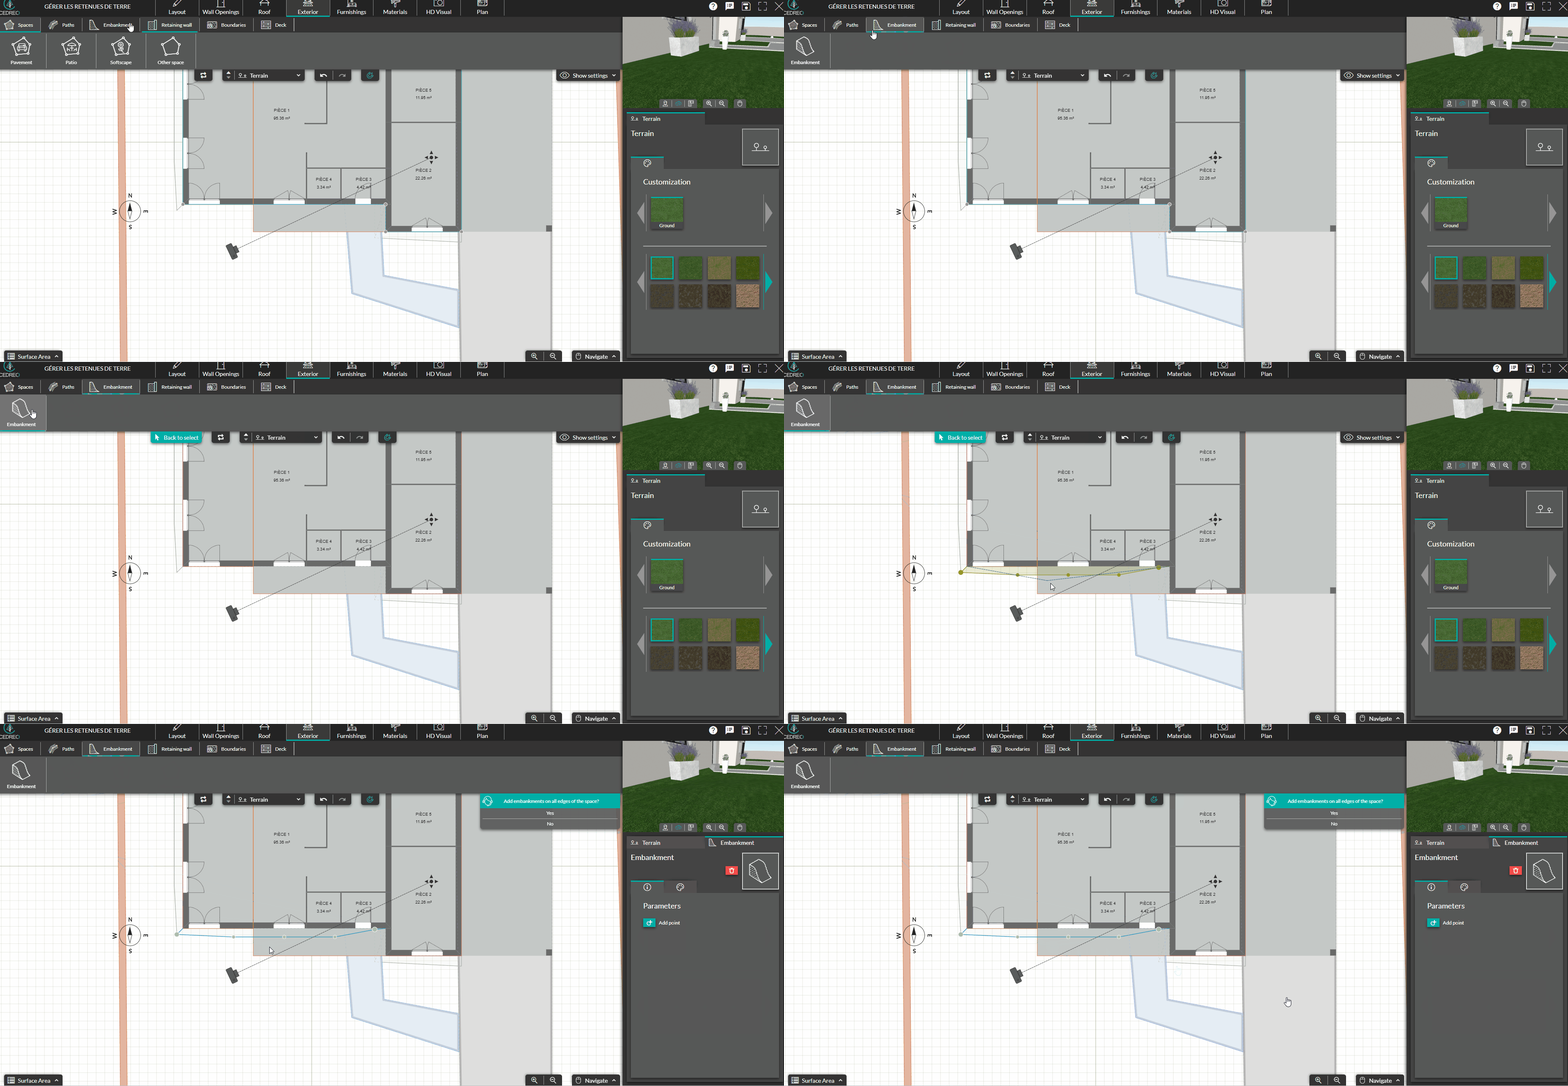
1. In the "Exterior" step, go to the "Embankment" sub-menu, and click on the dedicated tool.
2. Position your wall on the edge of an area or lane and click to validate.
❗An embankment can only be created on an "available" area, i.e. an area that does not have a retaining wall

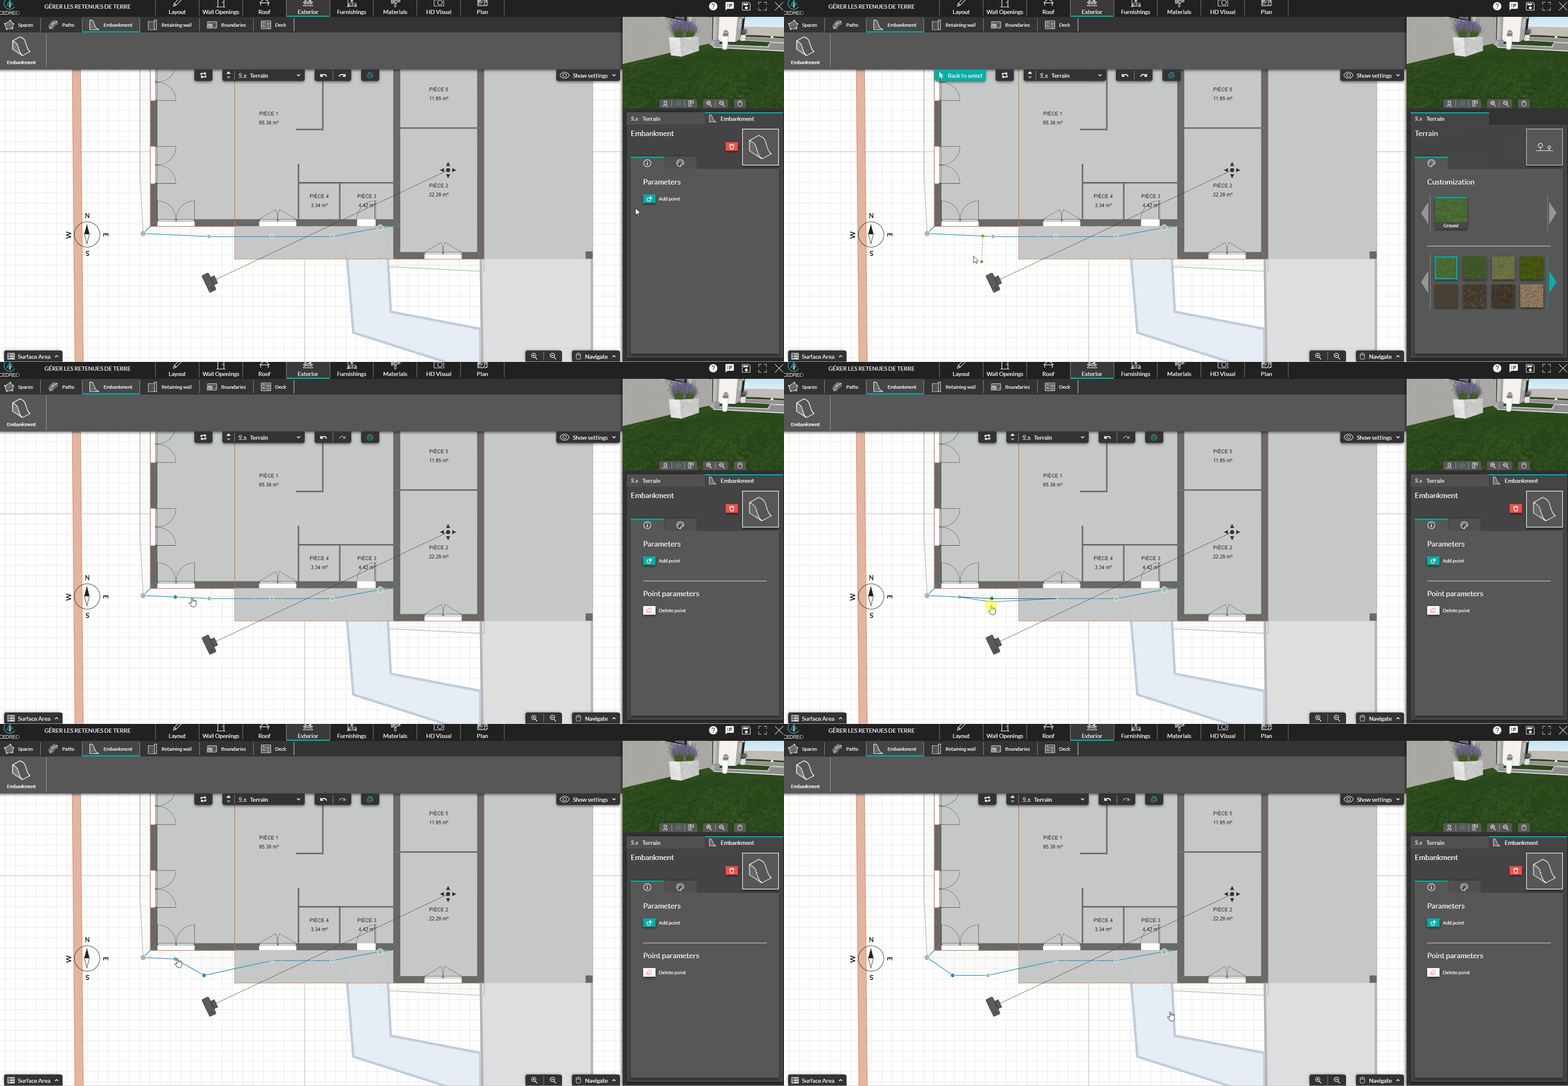
- Click on a point and use the mouse to move it to your desired location.
- Click on the "add point" button in the column on the right. This will allow you to add a point and thus change the shape of your slope area.

💡 You can change the material in the "Customization" tab on the right. Don't hesitate to do it in the "Coating" step to have more choices.