THE ICONS ON THE TOP RIGHT CORNER
On the top right corner, you have 5 icons :
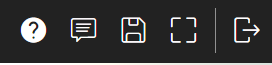
1. The first one, represented by a question mark, gives you access to the help center where you can find all the Cedreo tutorials.
2. The discussion icon gives you access to the chat, where you can get in touch with a Cedreo coach (for professional and enterprise account only)
3. The save icon allows you to save the modifications added to your project.❗Your modifications are not automatically saved, you have to save them to avoid losing any changes. If you forget to, use the automatic backup.
4. The fourth icon allows you to enlarge the Cedreo page to have a full screen.
5. Finally, the last icon allows you to leave the project. A bar at the bottom of your screen will suggest you save your changes or close without saving.
THE STEPS, MENUS AND SUBMENUS
There are 9 steps in Cedreo, 6 in 2D, and 3 in 3D. The modifications made in 2D, such as drawing walls, adding wall openings, and laying a roof, are reflected instantaneously in the 3D view.
❗Modifications made into the 'Plans details' and 'Folder' steps do not apply to the 3D view.
There are menus and sub-menus under the steps, allowing you to perform various actions, such as drawing walls, installing openings, drawing exterior spaces, and applying materials.

THE CATALOG
In the 'Wall Openings', 'Furnishings', 'Materials' and 'Plans details' (symbols) step, you'll have a catalog from which you can choose the coating to apply, the wall openings to install, or the product, symbols to place.
Here, for example in 'Wall openings', you can use the search bar or open the catalog and select, for instance, the type of openings you want, and then more specifics about it.
THE RIGHT HAND PANEL
On the top right of the software, you’ll see a 2D screen if you are currently in 3D and vice versa.
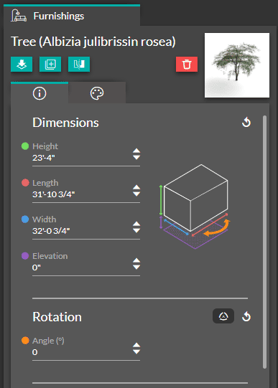
You can use the right panel to change the characteristics of a selected item (furnishing, exterior spaces, opening walls, rooms, roof, etc…)
THE WORKSPACE BUTTONS
In your workspace, you'll see different buttons depending on the stage you're at in your design. The main buttons are :
|
The repetition action This button allows you to place the same element (opening walls, furnishings, materials, etc.) several times. |
|
 |
The magnetism This button allows you to draw straight and at right angles, and to hook onto the walls of other levels. |
|
The aspect ratio conservation This button enlarges and reduces a project while maintaining its proportions. |
  |
The undo/redo arrows These arrows allow you to go back to a completed action or to return to the last completed action. |
|
The level menu It allows you to change levels in order to move to a higher or lower level. |
|
|
Display options This drop-down menu lets you modify display options (remove grid, layer, roof, etc.). |
|
|
The surface area In the bottom left-hand corner, you'll find real-time access to the surface table, which corresponds to the one you'll find in the "Plans details" step. |
|
  |
The zoom in and out buttons These buttons allow you to zoom in and out of your project without using the mouse. |
 |
The navigation tab Navigation arrows let you move around without using the mouse if you need greater precision |
|
|
The different types of camera There are 3 types of camera on Cedreo:
|


