The Mouse in 2D Steps
In stages like "Layout" / "Opening" / "Roof" / "Exterior" / "Plan details" / "Folder", the mouse has specific functions:
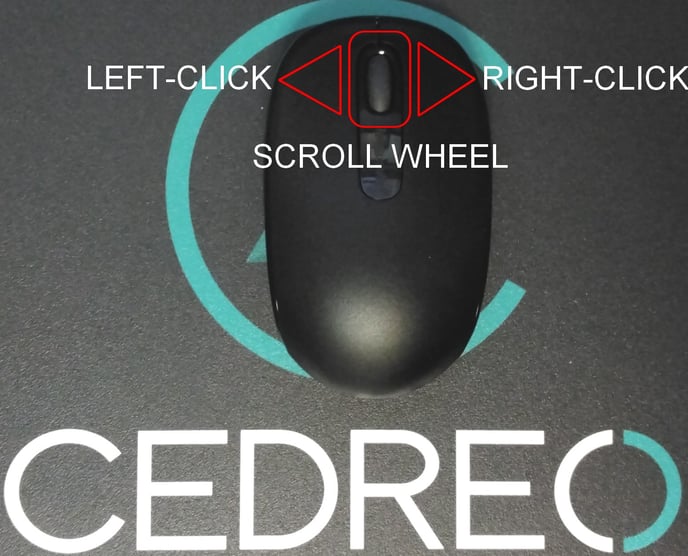
- Left-click: select / validate an action
- Right-click and hold: move laterally (north / south / east / west)
- Scroll wheel: zoom in (forward) / zoom out (backward)
The Mouse in 3D Steps
In the steps 'Furnishings' / 'Materials' / 'HD Visual', the mouse functions will change depending on the selected camera.
❗ The left-click still serves the function of selection (e.g., click, select, place a product) and confirmation.
- 3D View (default camera)
- Continued left-click: rotate on all three axes (horizontal / vertical / diagonal) - move a product / shape when selected
- Continued right-click / scroll wheel: move horizontally
- Scroll wheel: zoom in (forward) / zoom out (backward)
- Eye level View
- Left-click and hold: change the viewing angle - raise / lower / turn the 'head'
- Continued right-click / scroll wheel: move horizontally
- Scroll wheel: move forward / backward
- Top View
- Continued left-click: move a product / shape when selected
- Continued left-click, right-click, or scroll wheel: move laterally (north / south / east / west)
- Scroll wheel: zoom in (forward) / zoom out (backward)
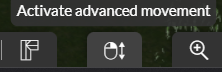
❗ You can activate the "Advanced Movement" option (at the bottom of your screen). It pertains to your right mouse click. When held down, it allows you to perform a vertical movement (up / down) of your project relative to your environment.