💡 Each tool shares the same options. This tutorial will demonstrate their default options.
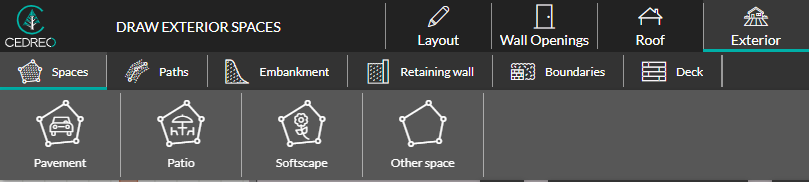
From the step “Exterior”, you can access the sub-menu “Spaces” within which are 4 types of spaces by default :
⚠️ A specific Menu exists to create a terrace. In fact, this element differs from a region and benefits from other configurable parameters.
Pavement and Patio (Flat regions) :
1. Select a type of region among “Pavement” and “Patio”
2. Trace the region to parameter.
By default, the region is flat, the reference point used to define the elevation of the region is the least elevated one based on the building of the region.
3. Edit the parameters of the region
Once selected, the region can be edited from the right column.
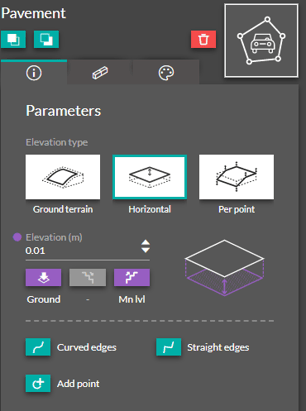
From the first index, you can edit the following parameters :
- Elevation type : behavior of the region based on the terrain. In this example of flat regions, their type of elevation is flat by default. The third option, “Per point”, allows you to consider each building point to modify the behavior of the region.
- Elevation : Enables you to define a customized elevation for the region or to fix it to the ground level as well as to any other level.
- You also have the possibility to define the shape of each edge of the region, straight or curved.
- Finally, you can add a point to a region if you wish to modify its shape.

The second index enables you to add borders all around the region. Once the option “Add all over” is selected, the edition parameters of the borders are available.
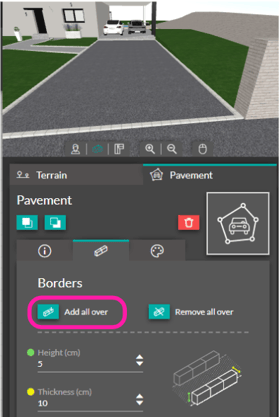
To delete the borders, you will have to select the region once again and to choose the option “Remove all over”.
The last index enables the selection of the materials among preselected options and to apply them upon the region. Notice that any materials from the step “Materials” can be applied onto a region.
Softscape, Other Space :
Those regions have the same options as the flat regions. The difference comes from their type of elevation by default. The hilly region is created by “following” the terrain.
In this case, the terrain is slightly sloped, the lowest elevation is on the front side of the house. The house being placed on the ground level (menu “Land” in the step “Layout”), therefore, the new region is more elevated than the back of the house. In fact, the region follows the slope of the terrain in which its elevation points are in the back of the terrain.
To cancel the encasement of the region, the type of elevation “Per Point” is very useful.
You then obtain the same result as if you had selected the type of elevation “Horizontal”, except now you can edit each point of the region to define automatically or manually its elevation.
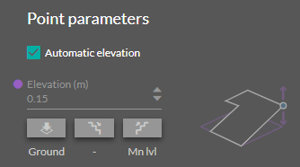
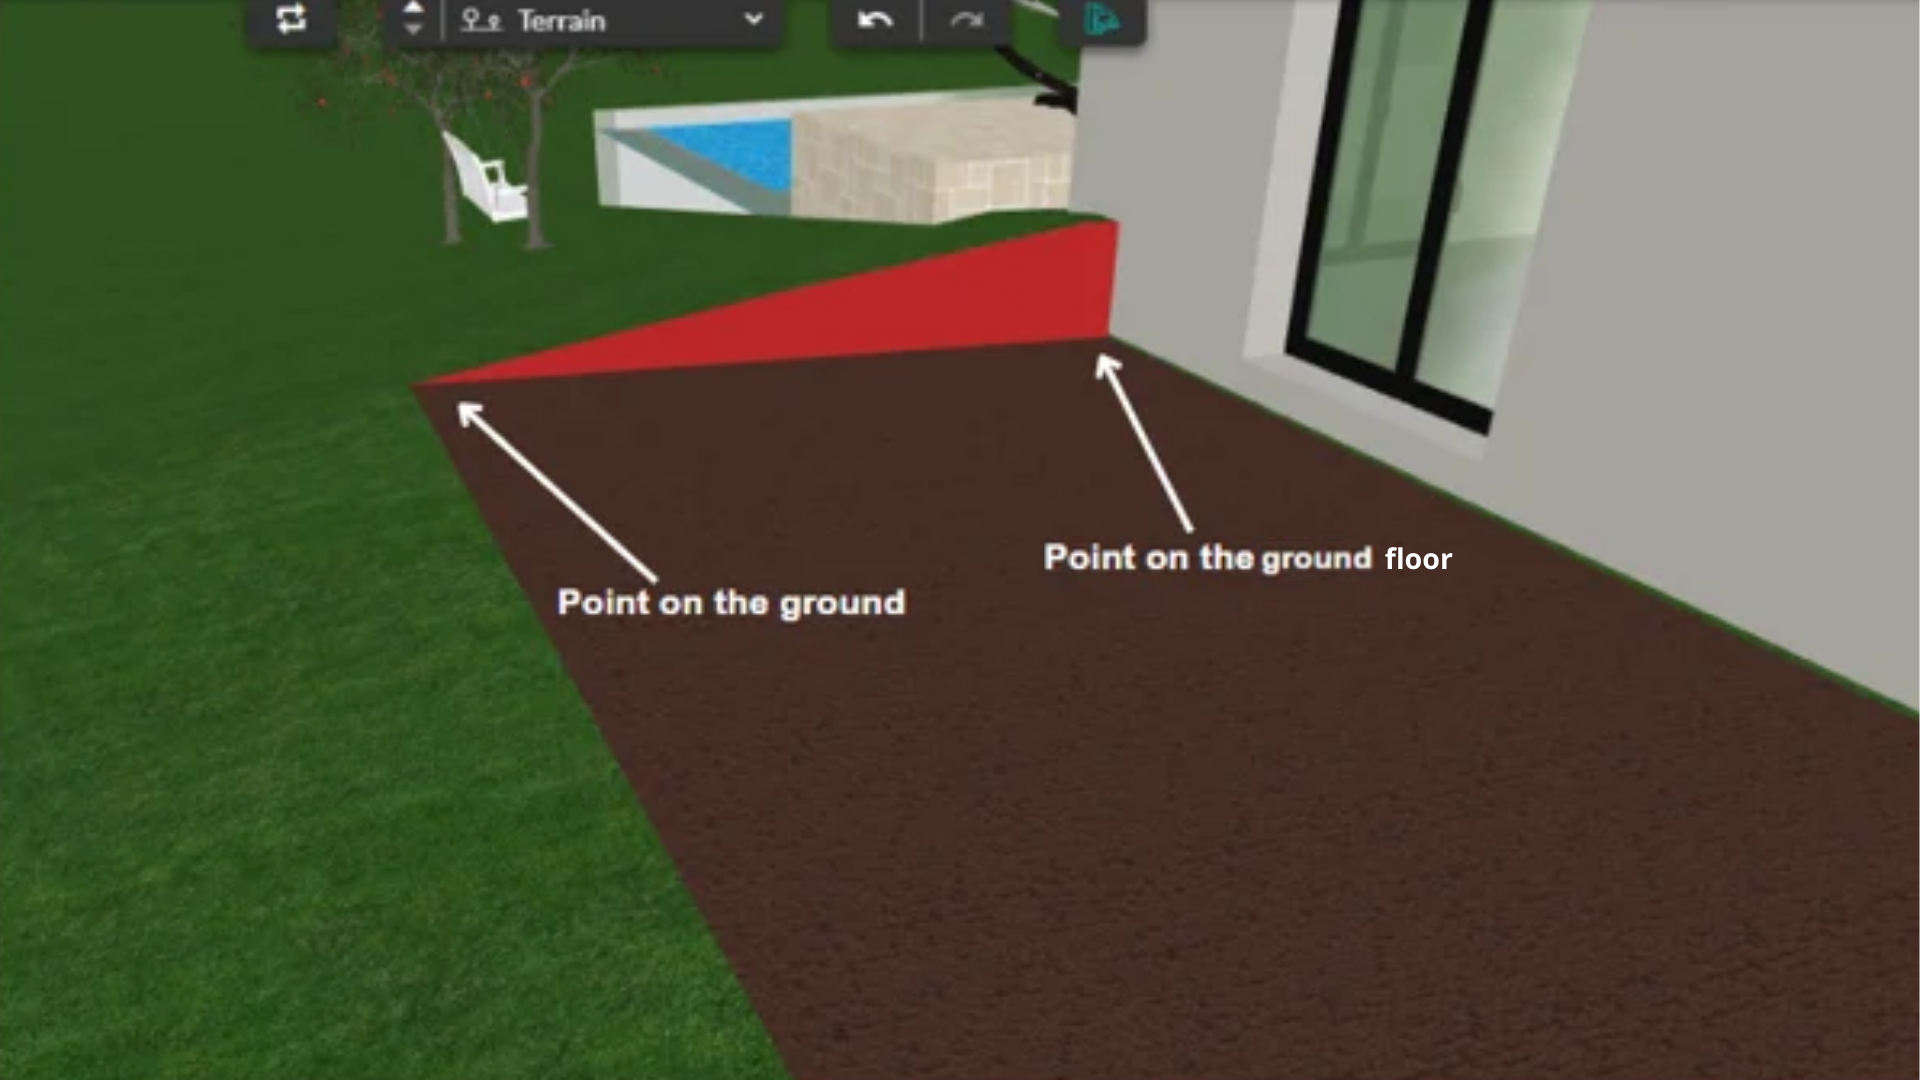
By unchecking the checkbox “automatic elevation” you can :
- Enter a value
- Select the option “ground”, the point will elevate to the lowest level of the terrain
- Base 1 to lower the point to the elevation of the basement
- 1 Floor to elevate the point to the highest elevation of the upper level
By using the previous exemple, after indicating the elevation “Mn Lvl” to the points closer to the building and “Ground” for the others, the region adapts and creates a slope joining the initial slope at the end of the Lot.