Level : intermediate / advanced
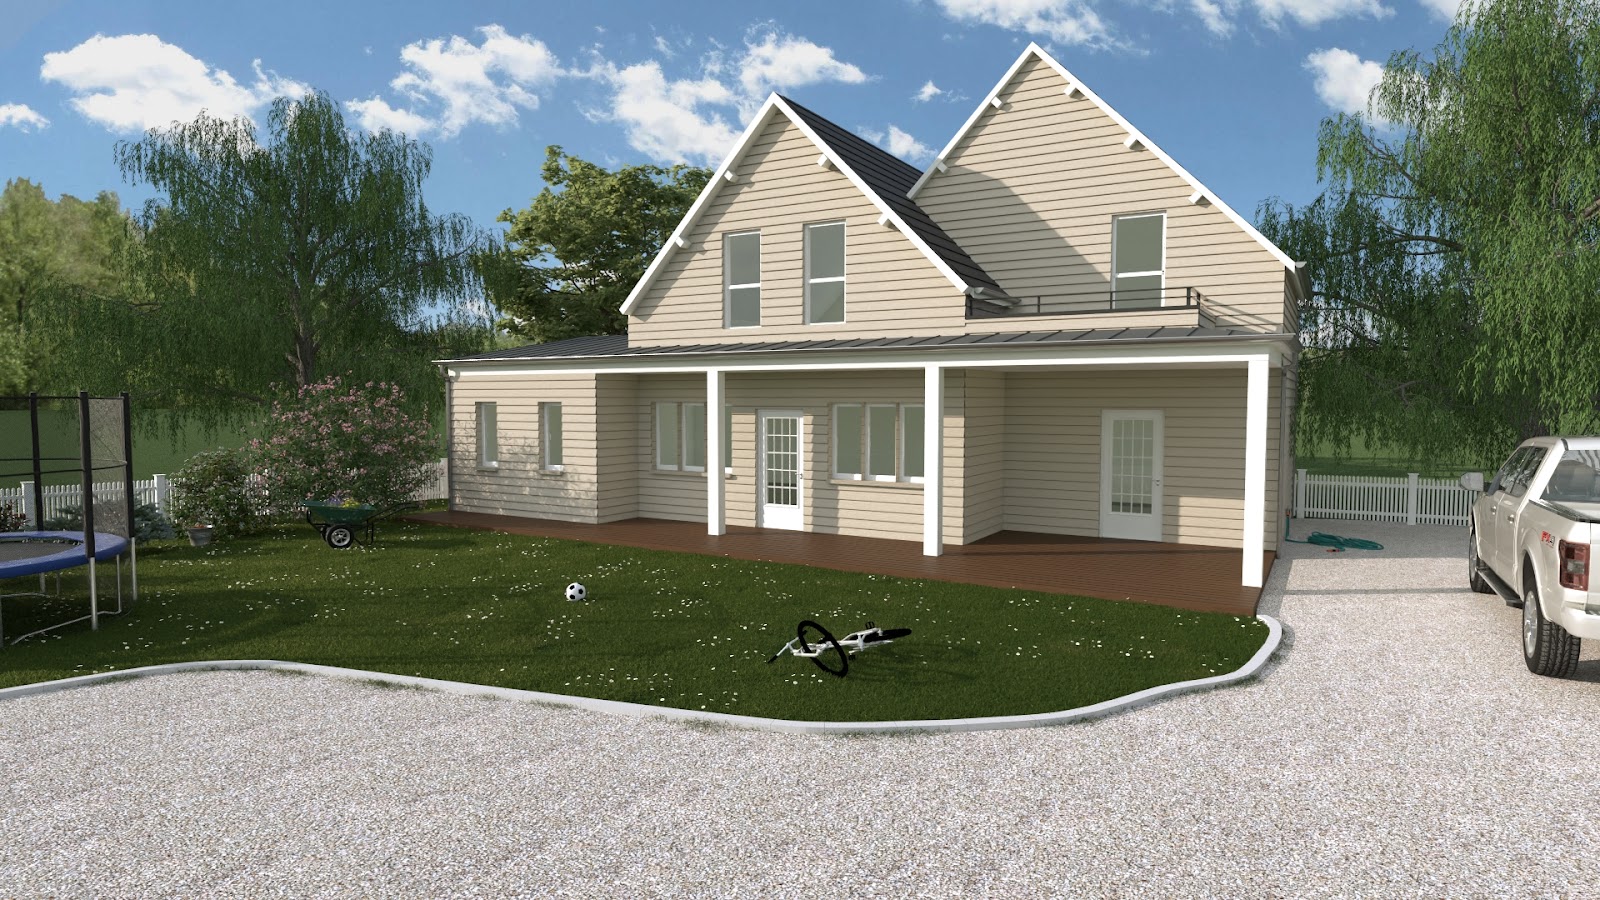
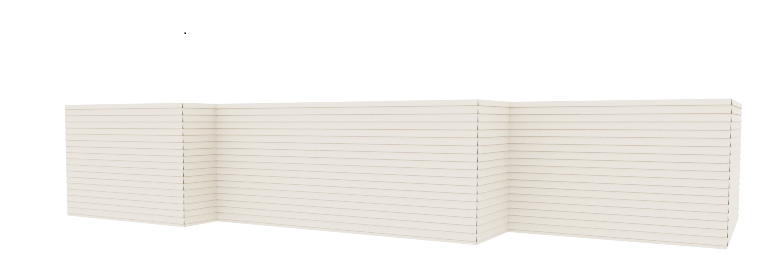
The expected result
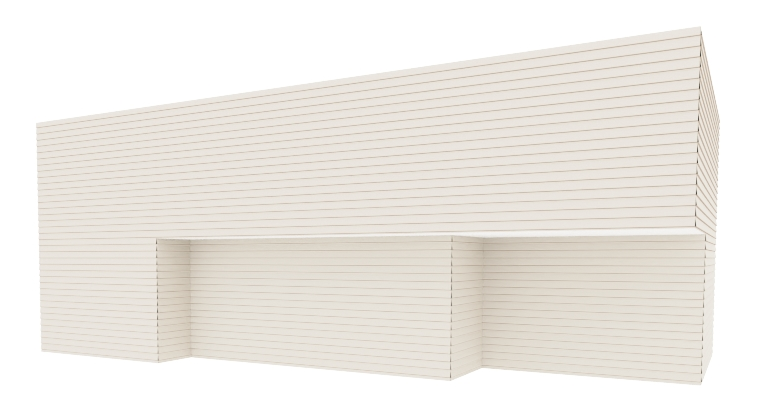
This is a complete roof tutorial. In this article we will focus on the house and the roof structures. If you follow the next steps, you will be able to obtain this result :
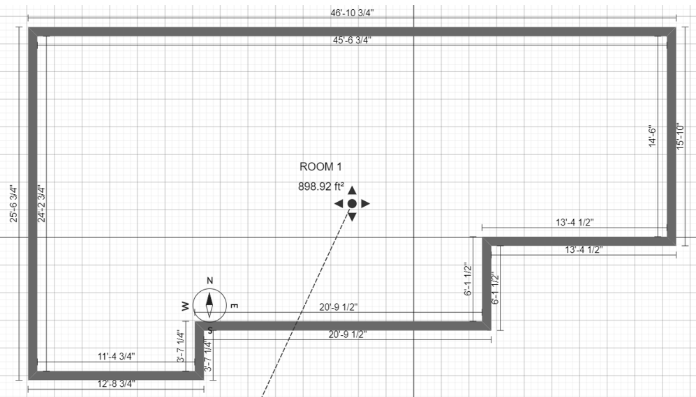
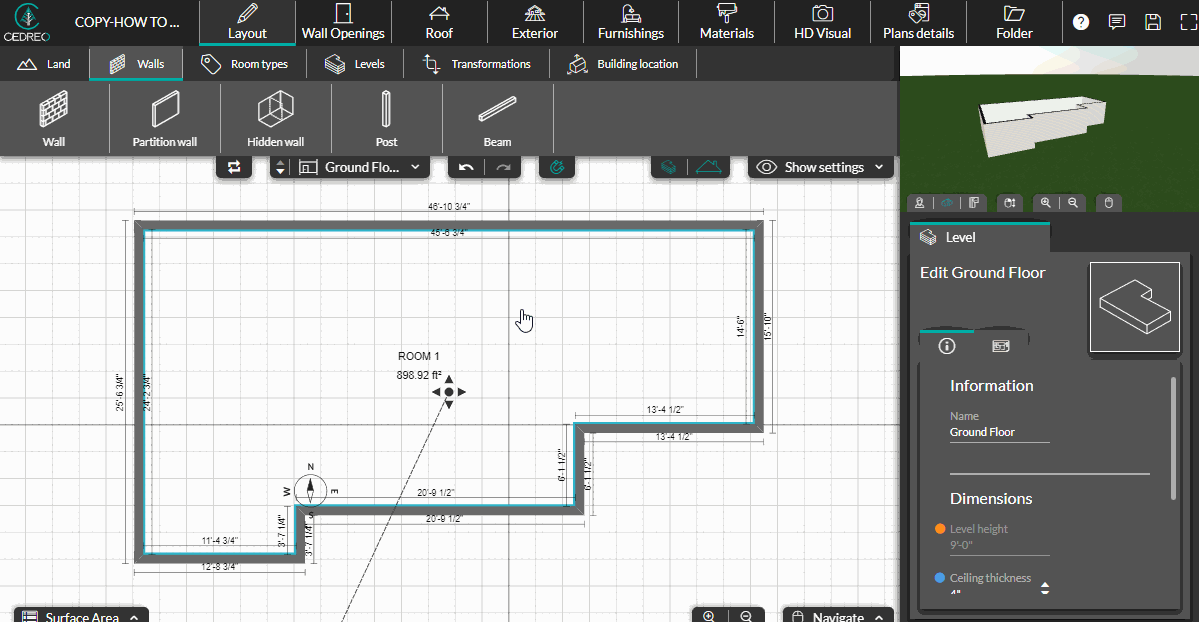
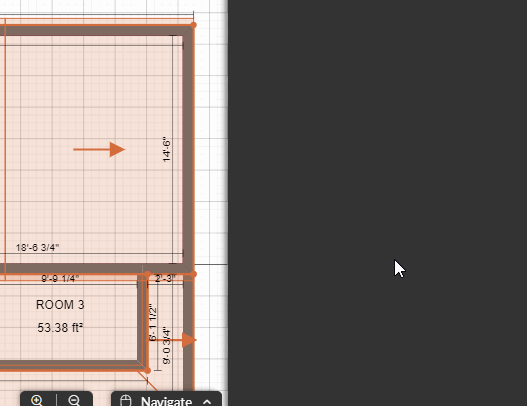
Draw the ground floor structure
This structure will depend on your project. You will find hereunder the structure used for this lesson.
- Go to the “Layout” step
- Select the “Walls” tool
- Draw the structure
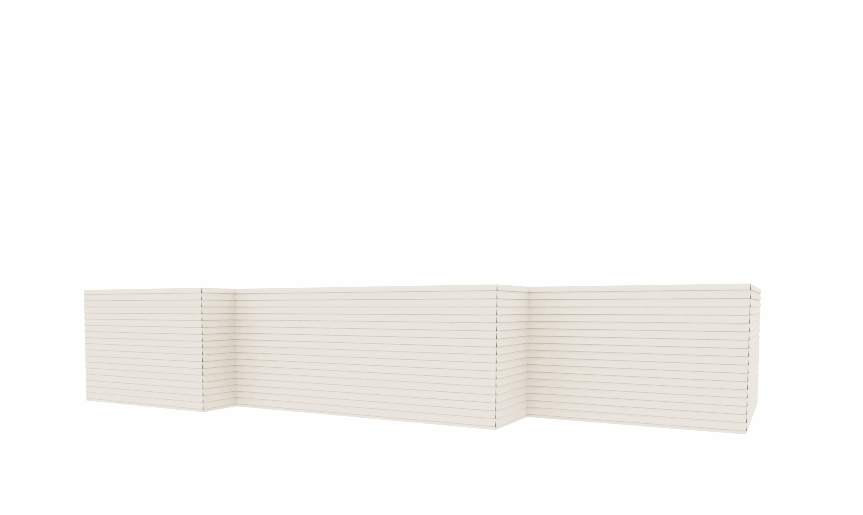
Then apply a material over the exterior sides of the walls :
- Go to the “Materials” step
- Browse or search for a material
- Click on the thumbnail of the material
- Click on the wall to apply it to the wall
You should obtain this :
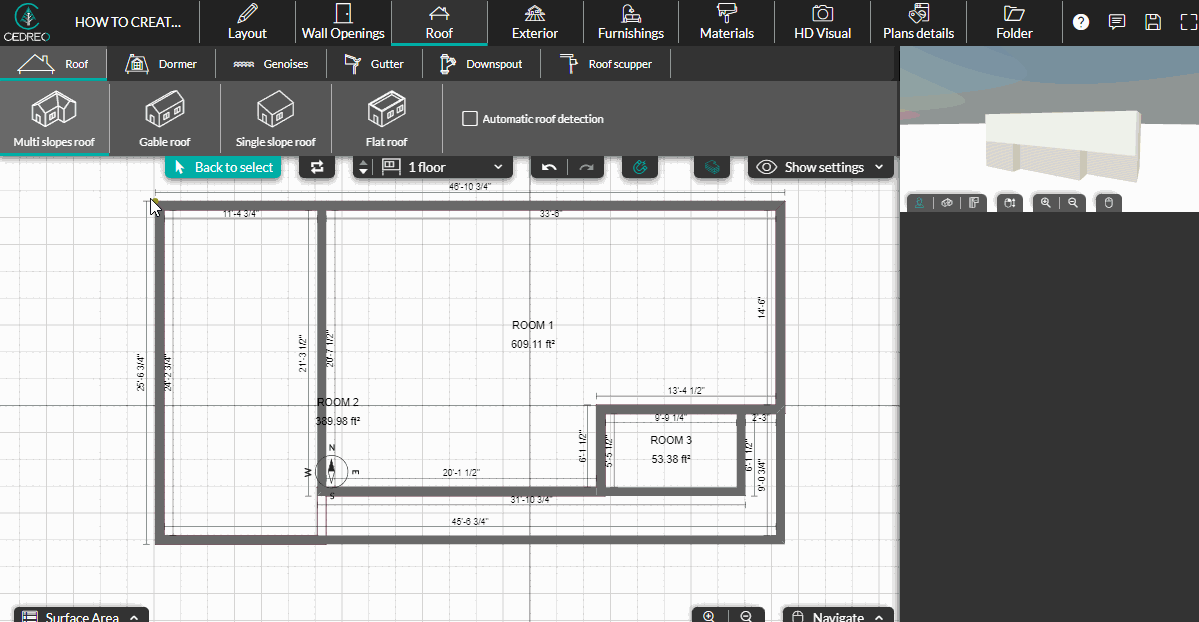
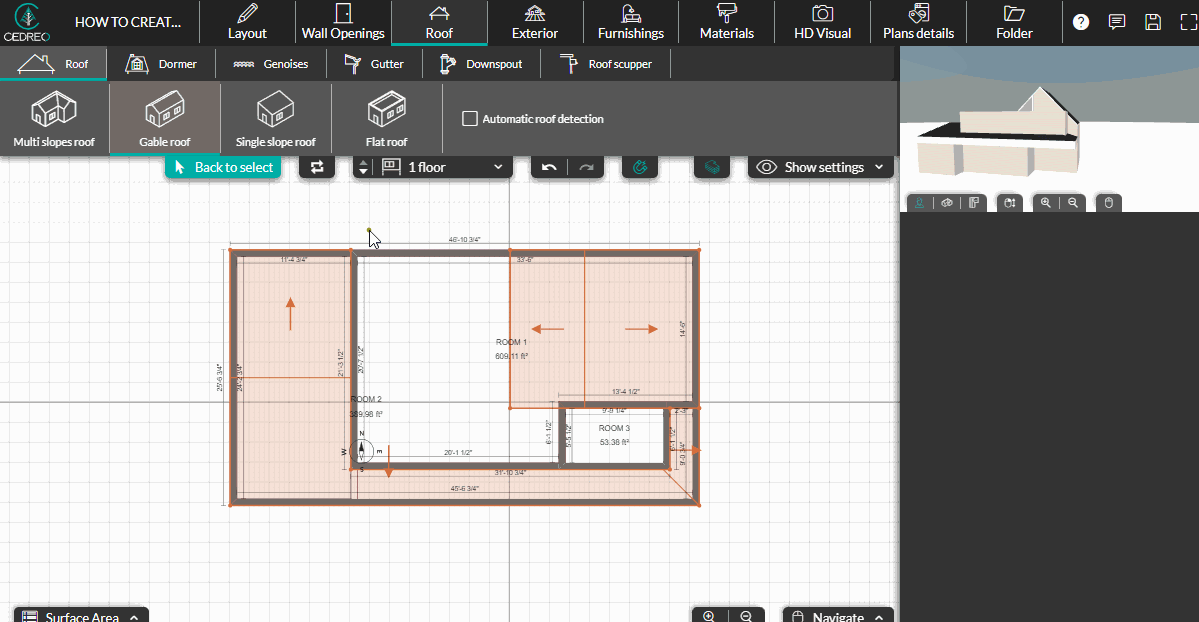
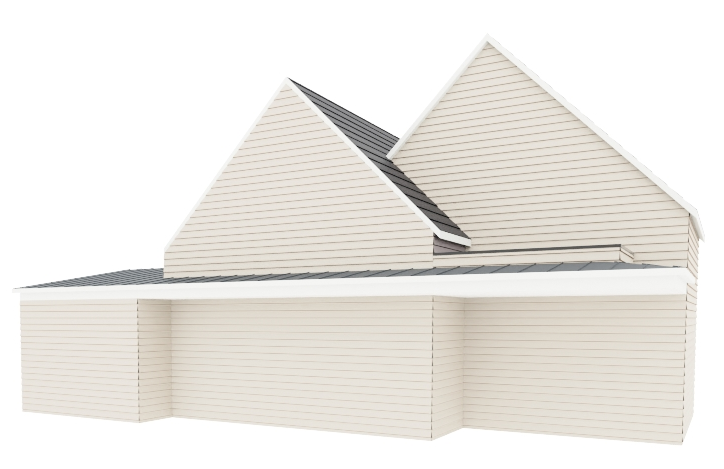
Define the roofs structure
A common mistake is to create the roof at the Groundfloor level and elevate the roof. This leads to have vaulted ceilings. In this lesson, the two gable roofs will have a vaulted ceiling but the Groundfloor living space area will have a ceiling.
Then, we need to create an upper level to create the roofs at this new level. Roof slopes or edges always cut walls, then we will add more walls at the first floor level for the porch and the flat roofs.
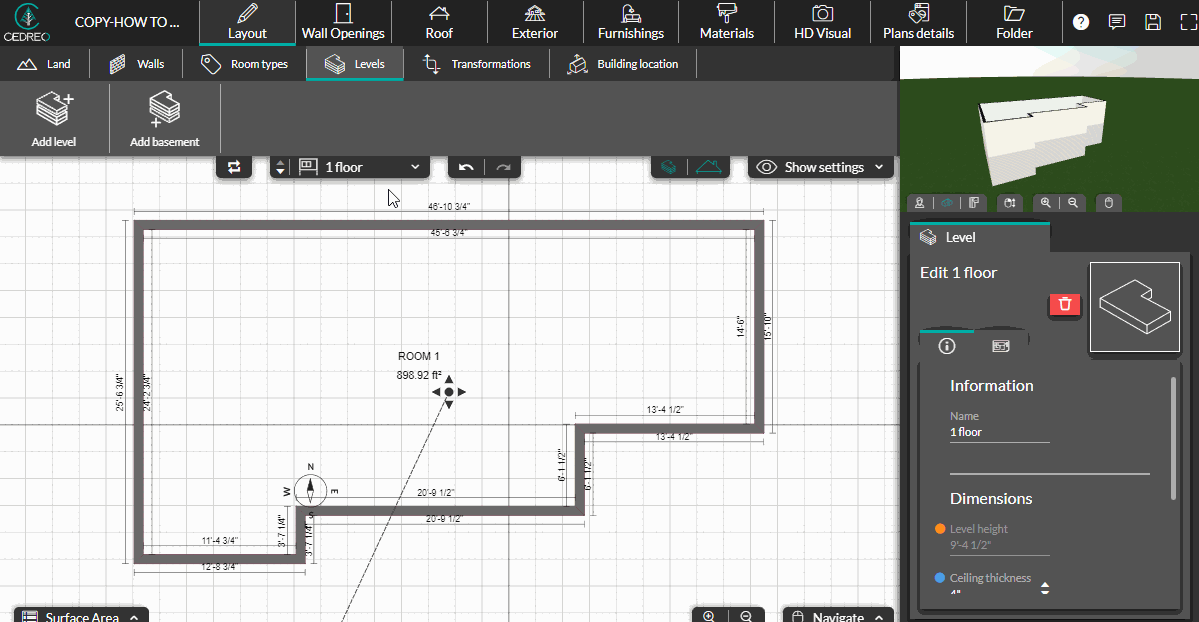
1. Duplicate the level, and let the assistant copy the existing walls at the Groundfloor level to the First floor level-
- Go to the “Layout” step
- Select the “Levels” tool
- Click on the “Add level” option
- When the assistant prompts a message, select the “yes” option
-
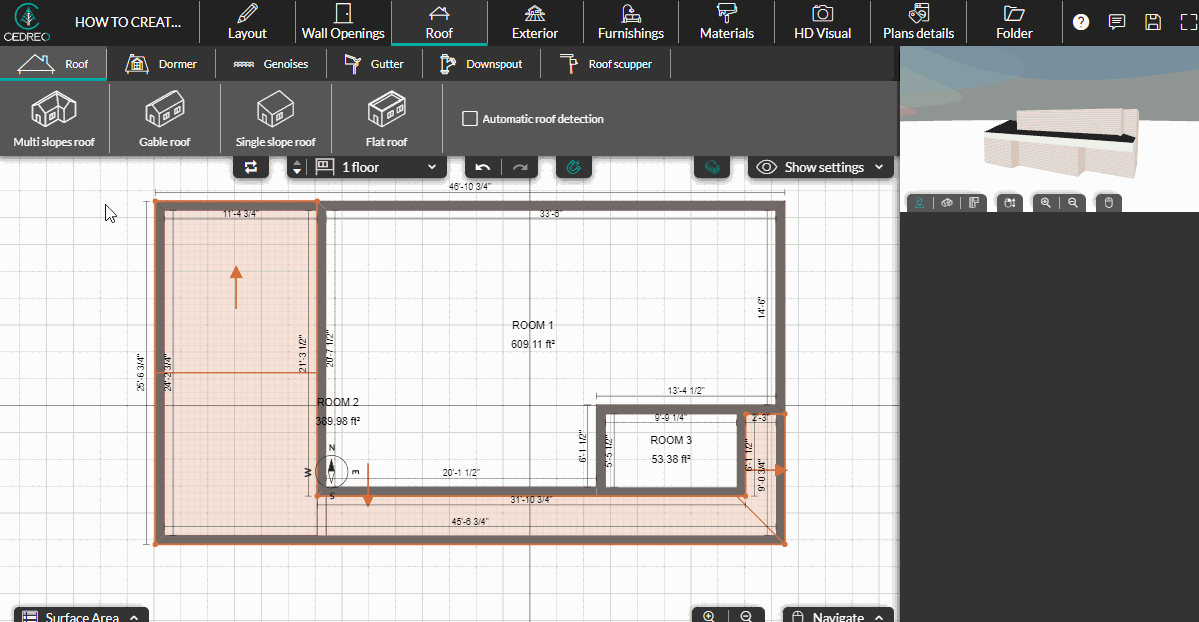
- Go to the “Layout” step (stay at the First floor level)
- Select the “Walls” tool
- Click on the “Wall” option and draw the structures
To complete the operation, copy the existing material on the wall of the Groundfloor level to the First floor level
- Go to the “Materials” step
- Click on a wall at the Groundfloor level
- Click on the “copy” icon
- Then click on the walls at the First floor level to apply the same material on them
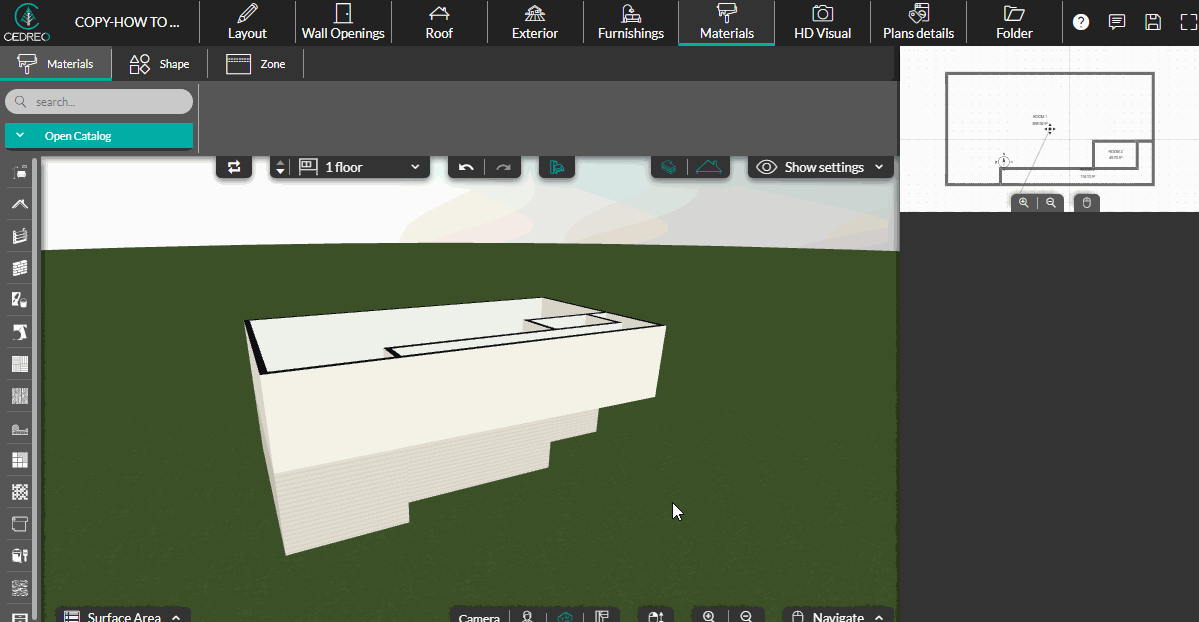
You should obtain this :
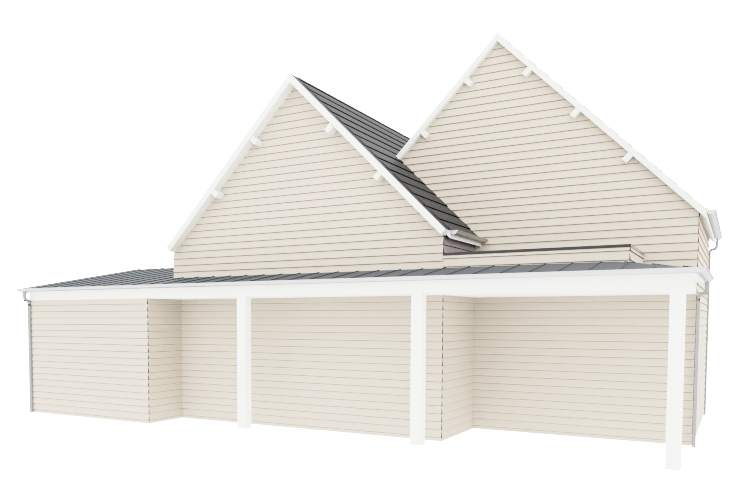
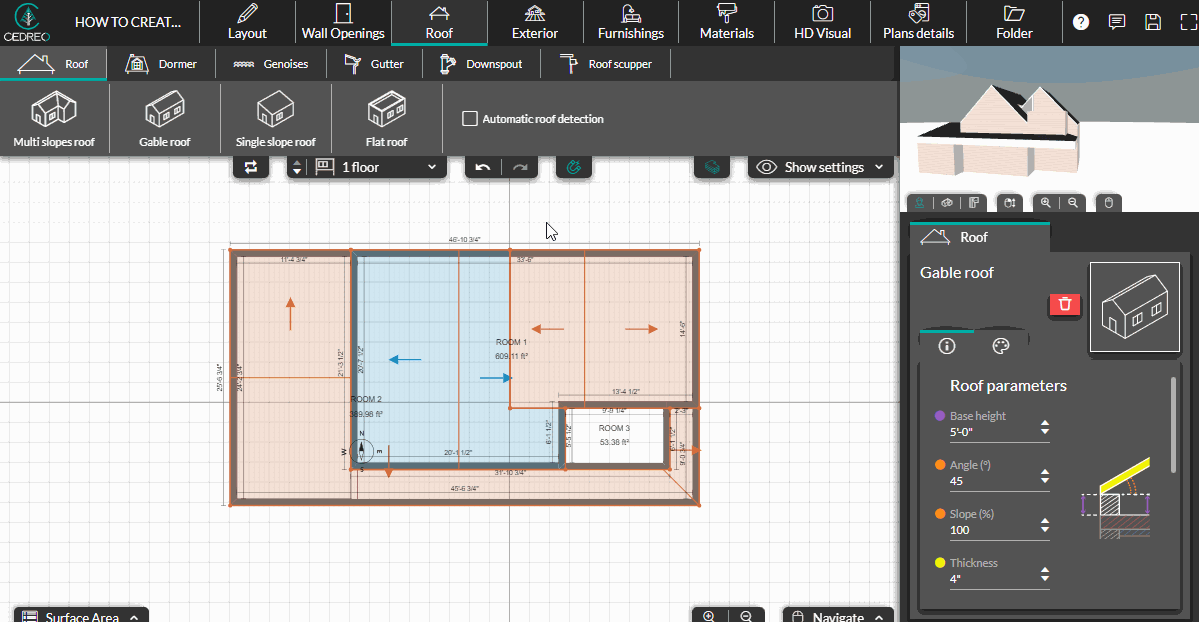
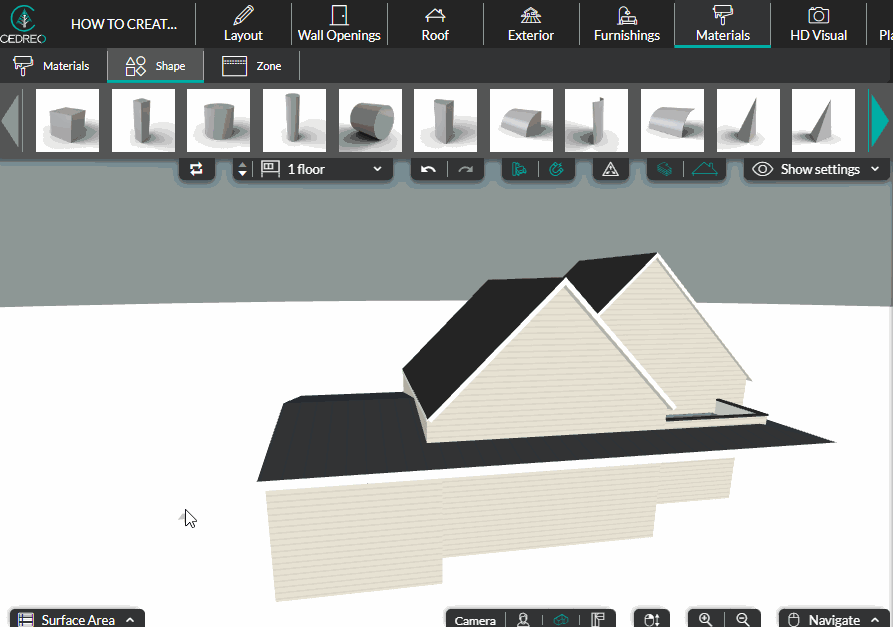
Create the roofs
In this project, there are 4 roofs : a multi slopes roof for the porch part, two connected gable roofs and a flat roof.
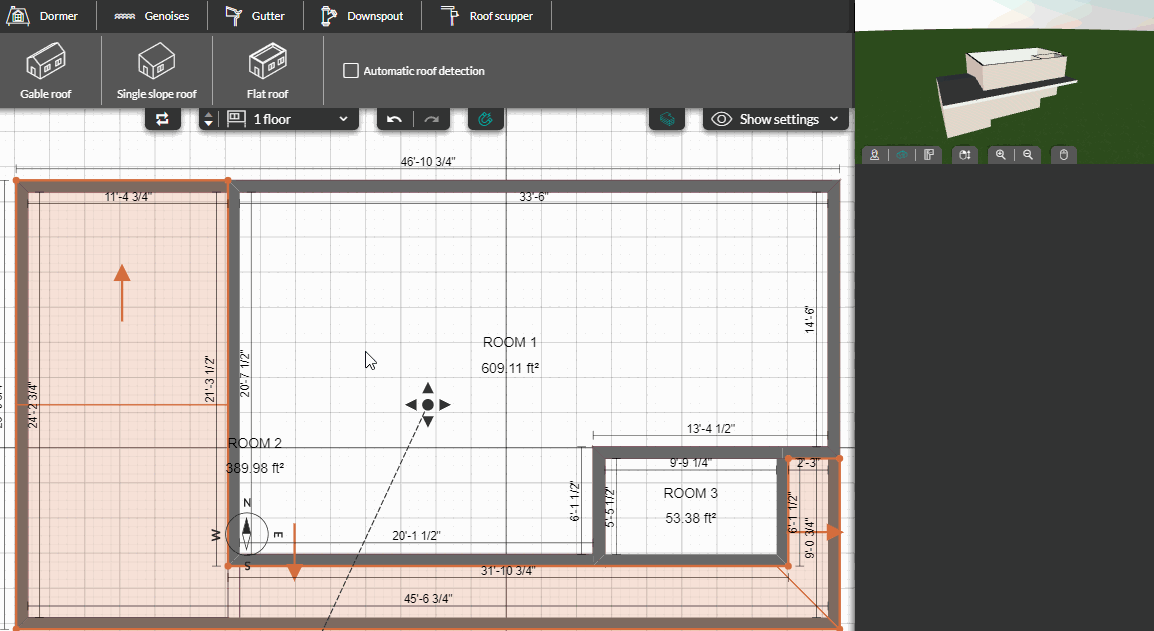
1. Create the porch part-
- Draw a multi slopes roof over the porch part
- We usually recommend to overlap walls while drawing a roof. In this specific case some walls are shared. As the porch part has a gable and two single slopes we will not overlap the “inside” walls
- Edit the roof edges properties to define whether it is a bottom slope or not
- Edit its slope
-
- Draw a gable roof
- Edit its ridge start option if needed by clicking on the edge you want the ridge to start from
- Edit its ridge offset
- Elevate the roof (”base height” option)
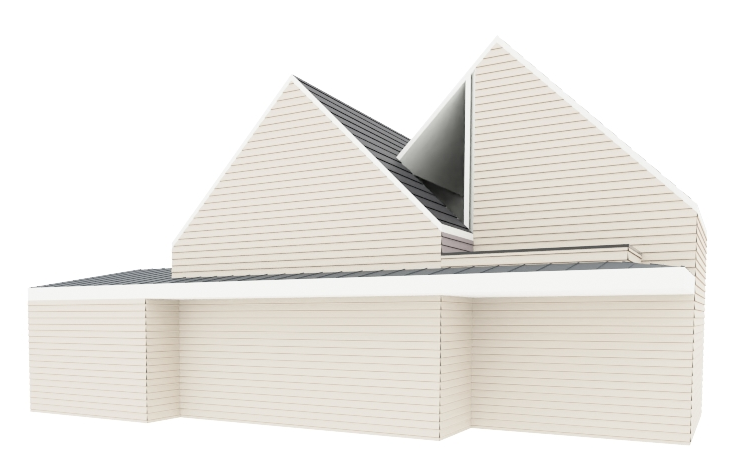
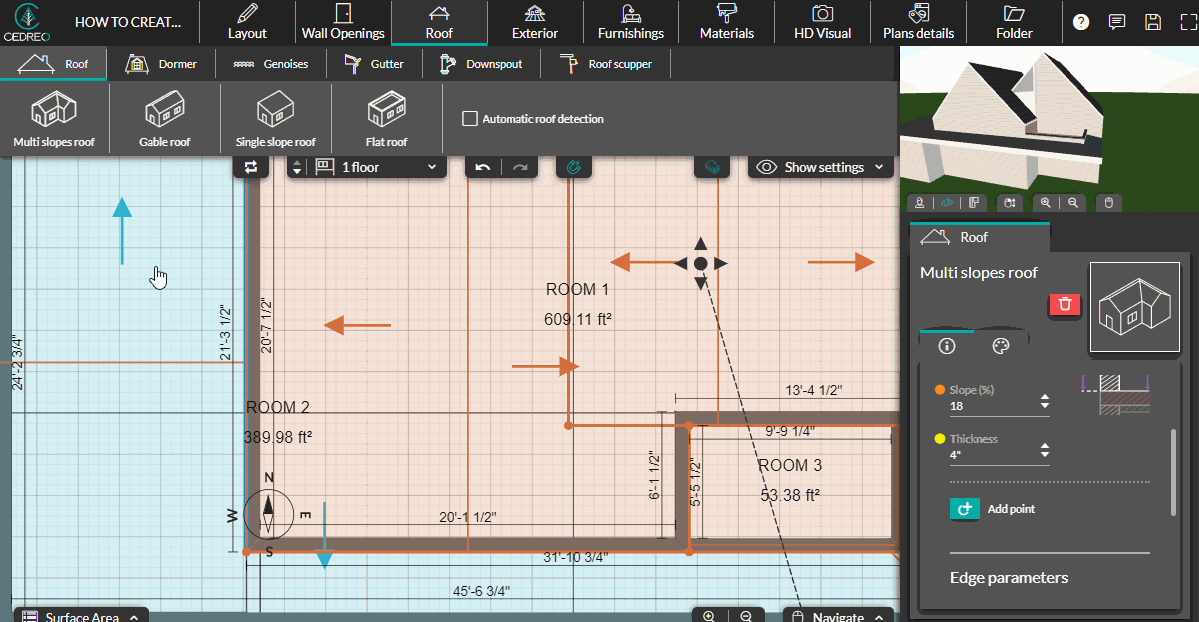
This is the same action than done with the nested gable roof except that we need to define a L shape :
-
- Draw the flat roof
- Do not overlap the walls connected to the gable roofs
- Elevate the roof (”base height” option)
- Remove the parapets next to the gable roofs
When this is done, apply the covering of your choice over the roof slopes from the “Materials” step.
You should obtain this :
Fill the hole in the building facade
Roof slopes cut walls. If there is no walls, there is nothing to cut and a hole will appear. To resolve this, you just need to add a wall where the hole is.
You should obtain this :

Roof overhang
Once your roofs are designed, select the bottom slopes edges and edit the ‘Overhang’ property value from the right options panel :
Note : you won’t see any visual update when trying to apply an overhang to the front part of the central gable roof. This is explained in the next section.
You should obtain this :
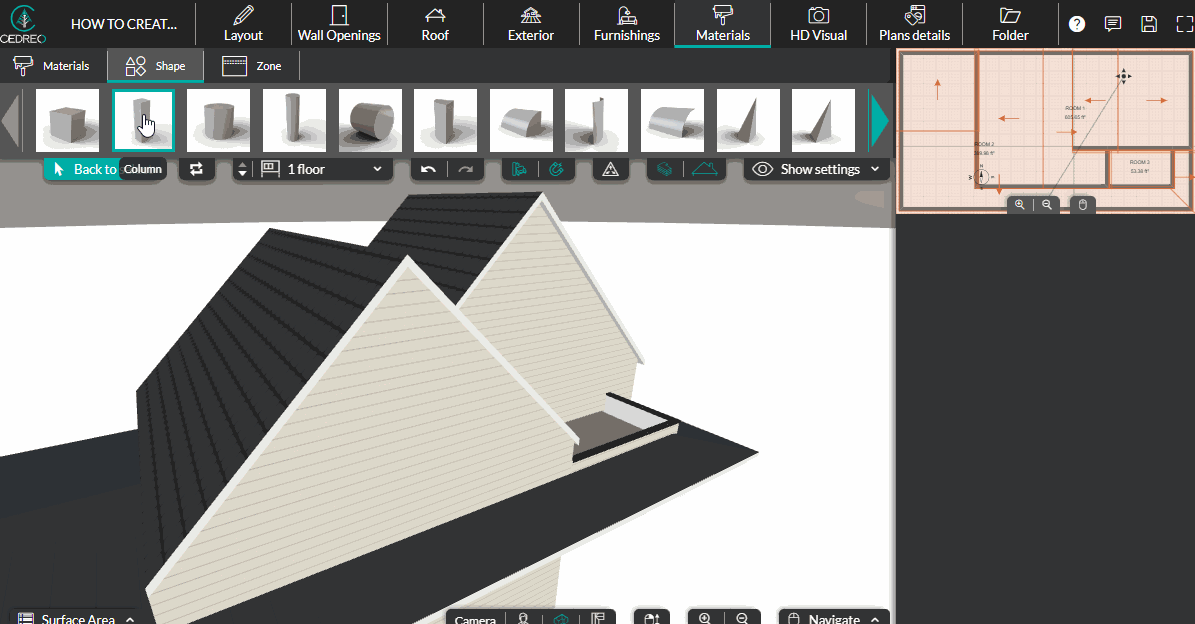
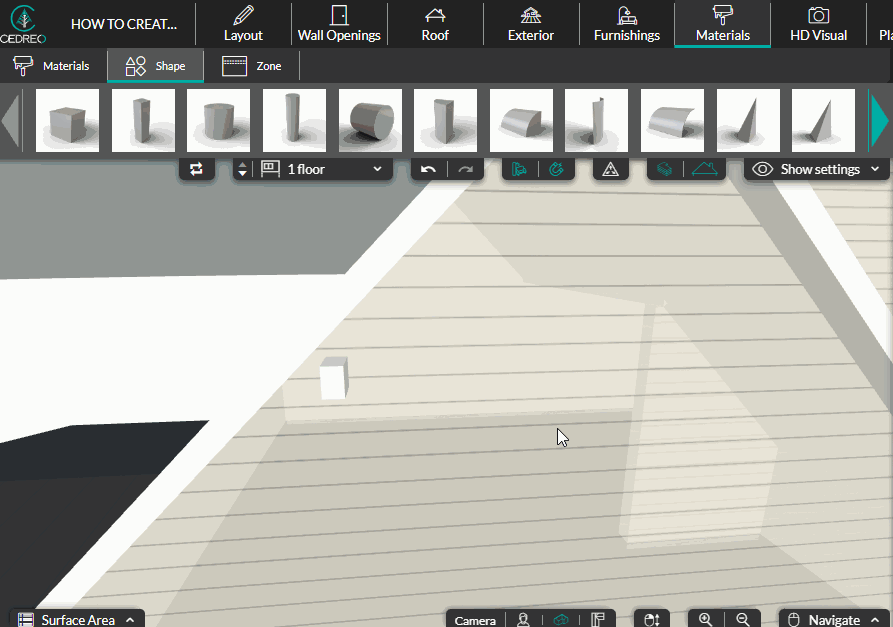
Manual overhang
In this project, it is not possible to apply an overhang to the central gable roof. The slope orientation of the multi-slopes roof (porch part) will prevent that. Then we need to create manually the overhangs. To do so, we will use 2 shapes, orient and resize them.
- Select the “1st Floor” level as the gable roofs are created here
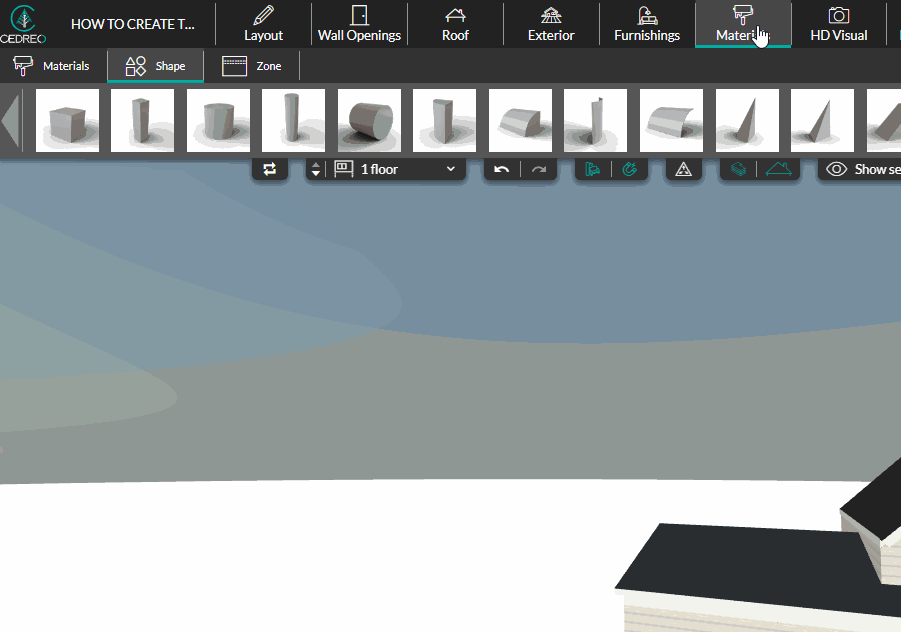
- Go to the “Materials” step
- Select the “Shape” tool
- Insert a column on the floor.
- Place it against the roof slope, on the facade
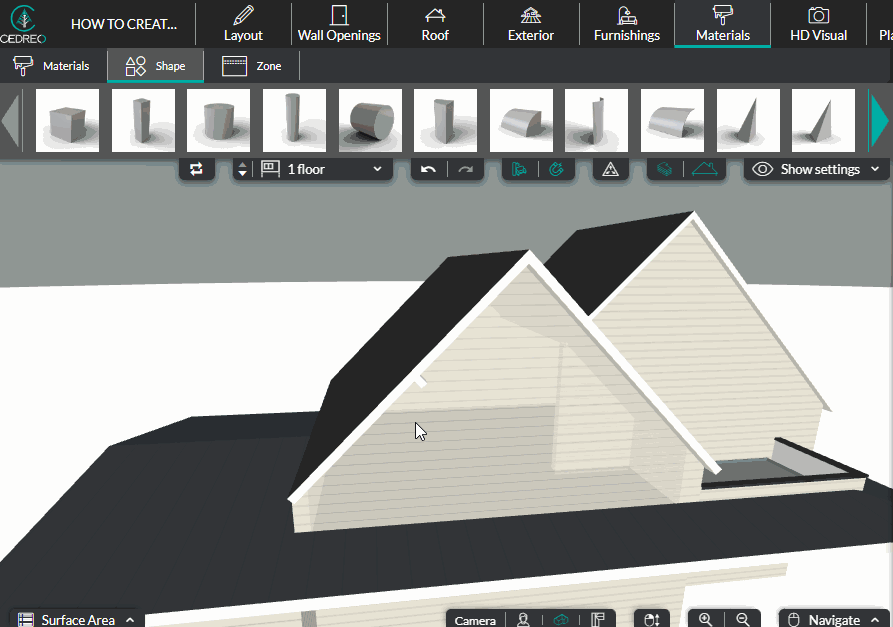
- Activate the advanced orientation tool
- orient it to fit the slope
Then edit its height, length, width and elevation. You can use the left and right arrows of your keyboard to fine tune the shape position.
To match perfectly the covering of the roof, copy the material applied to the roof and paste it over the shape. Edit the material position if needed :

You should obtain this :

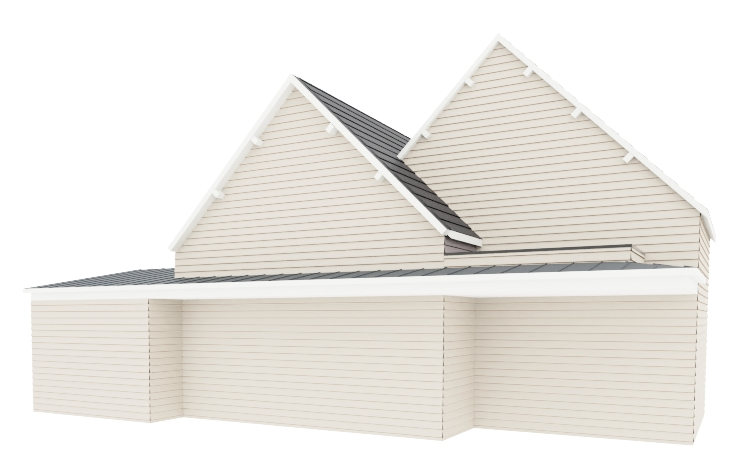
Facade beams
This is the trickiest part of the project. You can skip this part if you don’t need beams. To create the facade beams, we will use shapes and split this step in two operations.
1. Create two facade beams, one for each orientation.As we defined and overhang of 5”, we will consider 4 1/4” length beams. In this example the height of each beam is set to 6 1/4” and the width to 9”.
- Select the “1st Floor” level as the gable roofs are created here
- Go to the “Materials” step
- Select the “Shape” tool
- Insert a column
Edit the shape properties so that they fit the beam dimension you need :

- Roughly position the shape
- Switch to the “top view” camera
- With the collision tool activated, place the shape against the wall
- Orient the beam and fine tune its position
To be able to orient the shape, activate the advance rotation tool :
Once you created this oriented beam, you can copy it and create the other beams oriented the same way. Be sure to paste the copied beam on “the floor”, not on a wall, otherwise it won’t be possible to keep its orientation :
Repeat the operation as many times as you need beams with this orientation. Then create another oriented beam for the other roof slope direction.
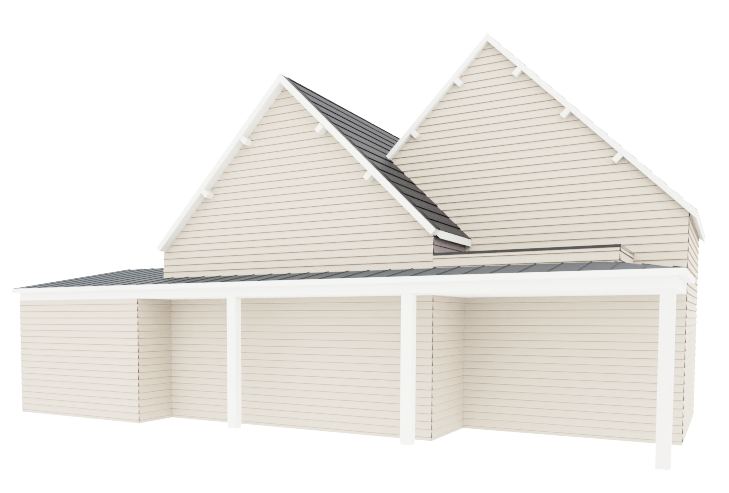
You should obtain this :
Porch posts
Adding posts for the porch is quite easy. In this project, posts support the porch roof created at the 1st floor level, then created them at the Ground Floor level.
- Go to the “Layout” step
- Select the “Walls” tool
- Choose the “Post” option
- Move your mouse pointer where you want to add the post. If you activate the magnetism they will snap to the wall created at the 1st Floor level you created for the porch structure.
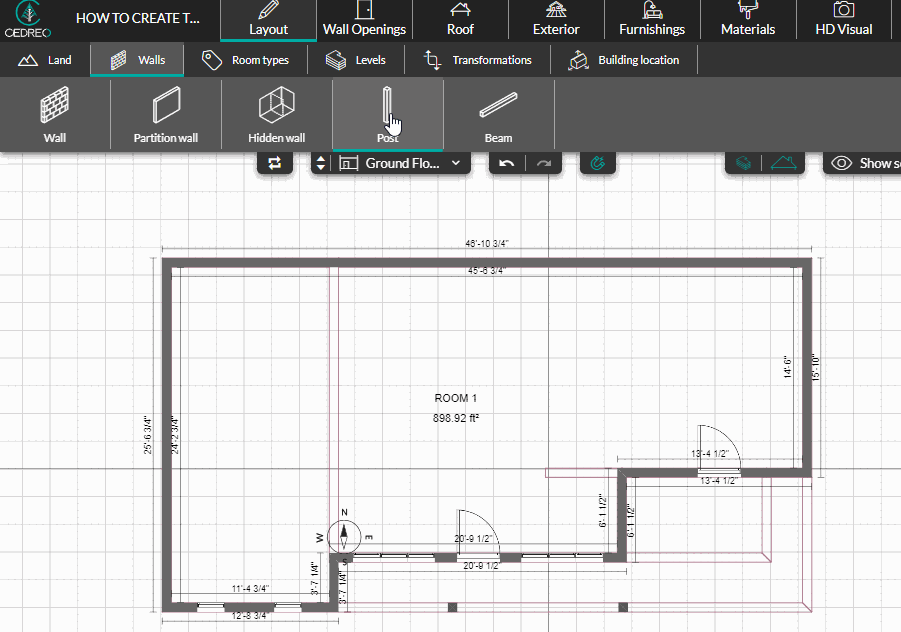
You should obtain this :
Gutters & downspouts
To complete the design, add the gutters. This will provide additional details to your project.
- Go to the “Roof” step
- Select the “Gutter” tool
- Choose one of the gutter options
- Move your mouse pointer to the bottom slopes where you want to add a gutter
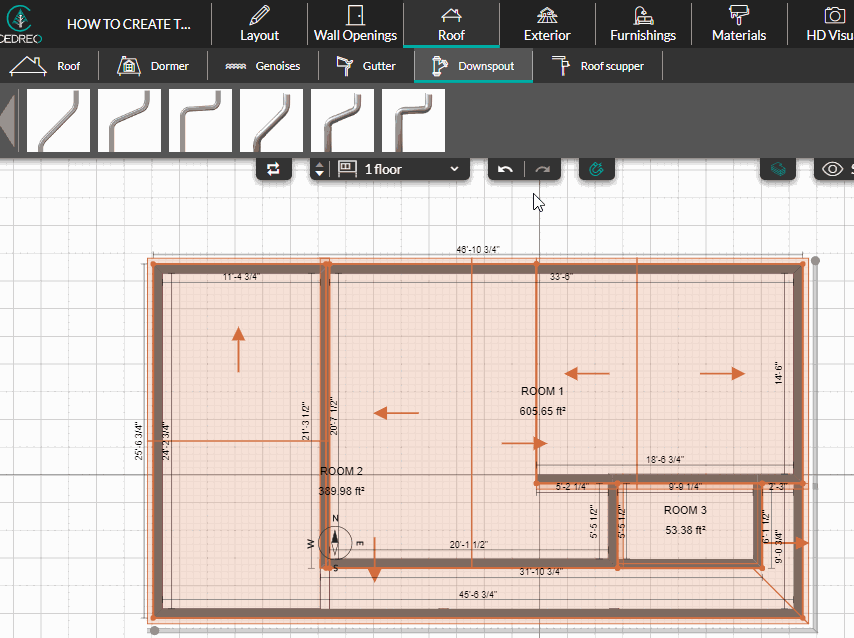
Repeat the previous actions with the downsput. They will snap to the existing gutters :